For Merchants
| ℹ️ Information for Merchants |
|---|
| The app is available on the PAX, Sunmi, Famoco , Ingenico stores (only accessible by POS Terminals) and Google Play (Android) and App Store (iOS). |
We would like to show you all the capabilities of the Sylq application for Points of Sale (POS) for Merchants based on Android. With the App you will enjoy different services to be able to manage your bank and/or cryptographic payments and as Merchants, you will be able to change your Profile data as well as add new Staff members.
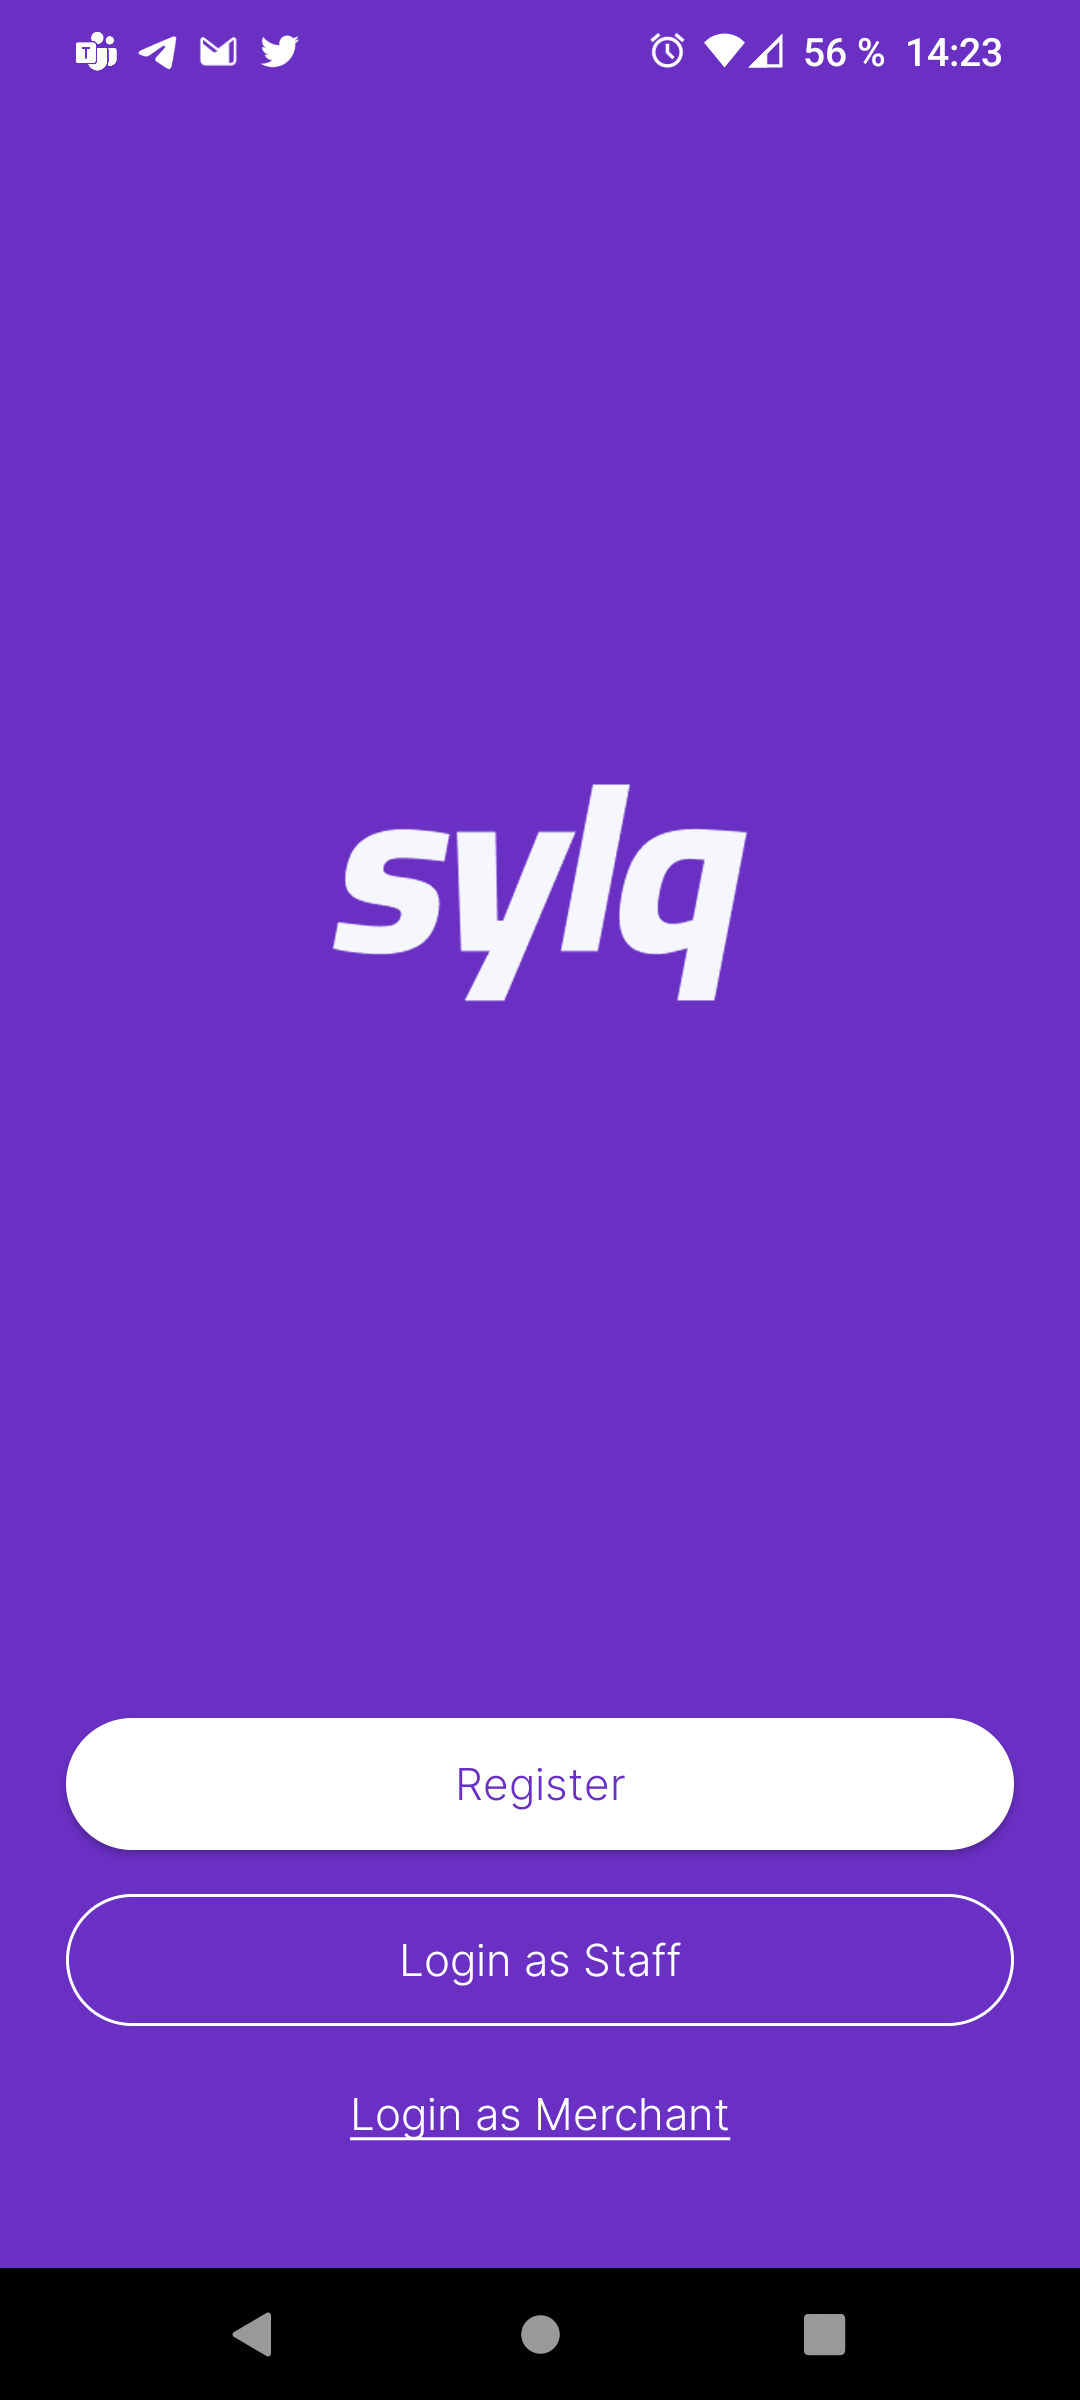
Login as a Merchant
To Login as a Merchant you need to select the option Login as Merchant on the first screen when you open the Sylq App:
Immediately next, please, can find your phone country code (flag) and introduce your mobile number (as a user) and clicks on Sign in, we will send you the SMS code to log in:

After receiving the SMS code you can introduce it on the next screen and validate your identity:
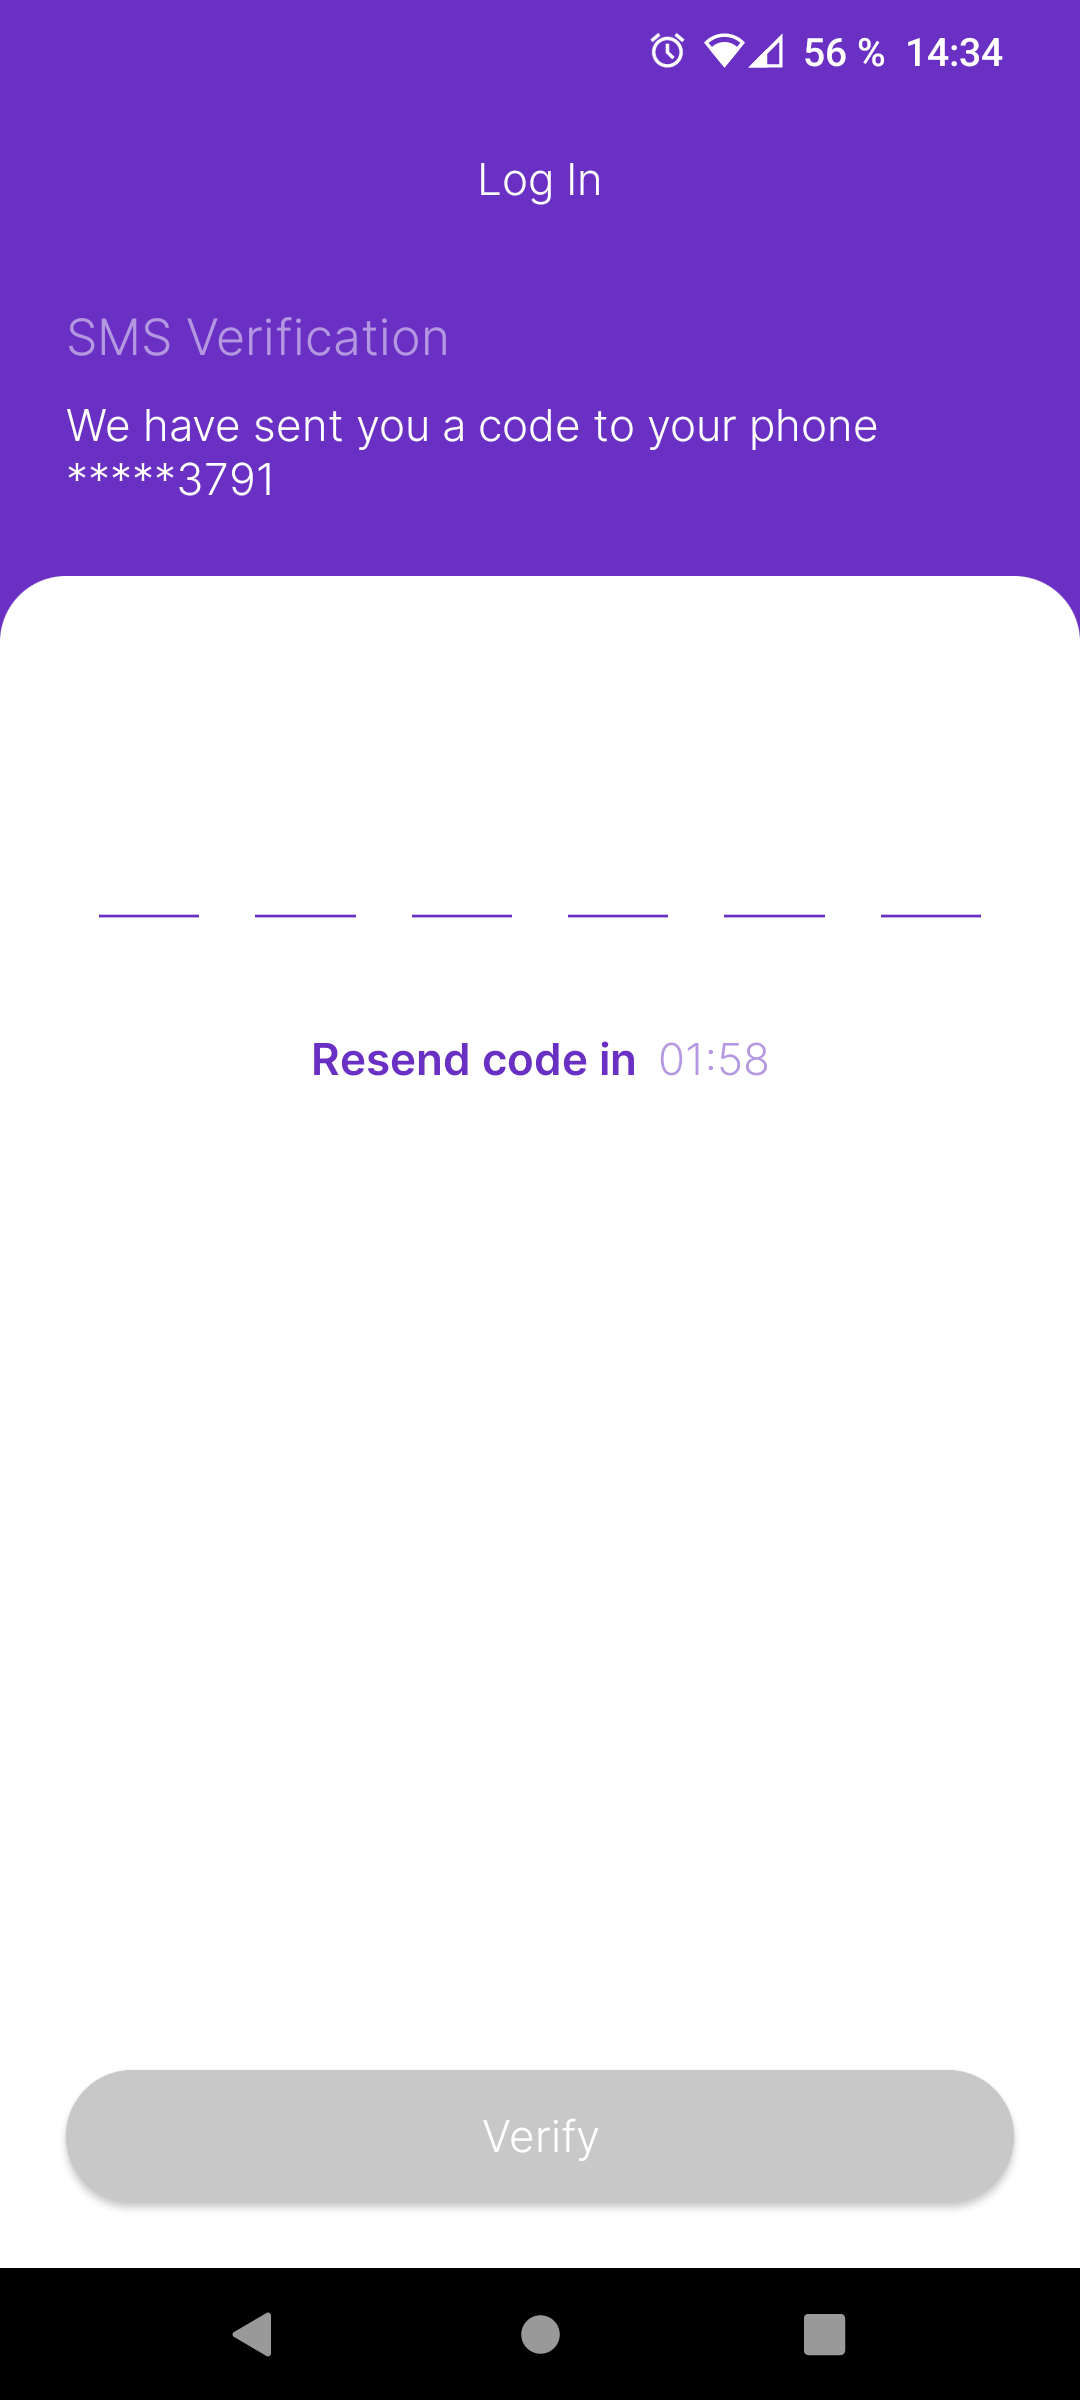
If it all is well, the App will redirect you to the Merchant Main screen:

Log out / Close App
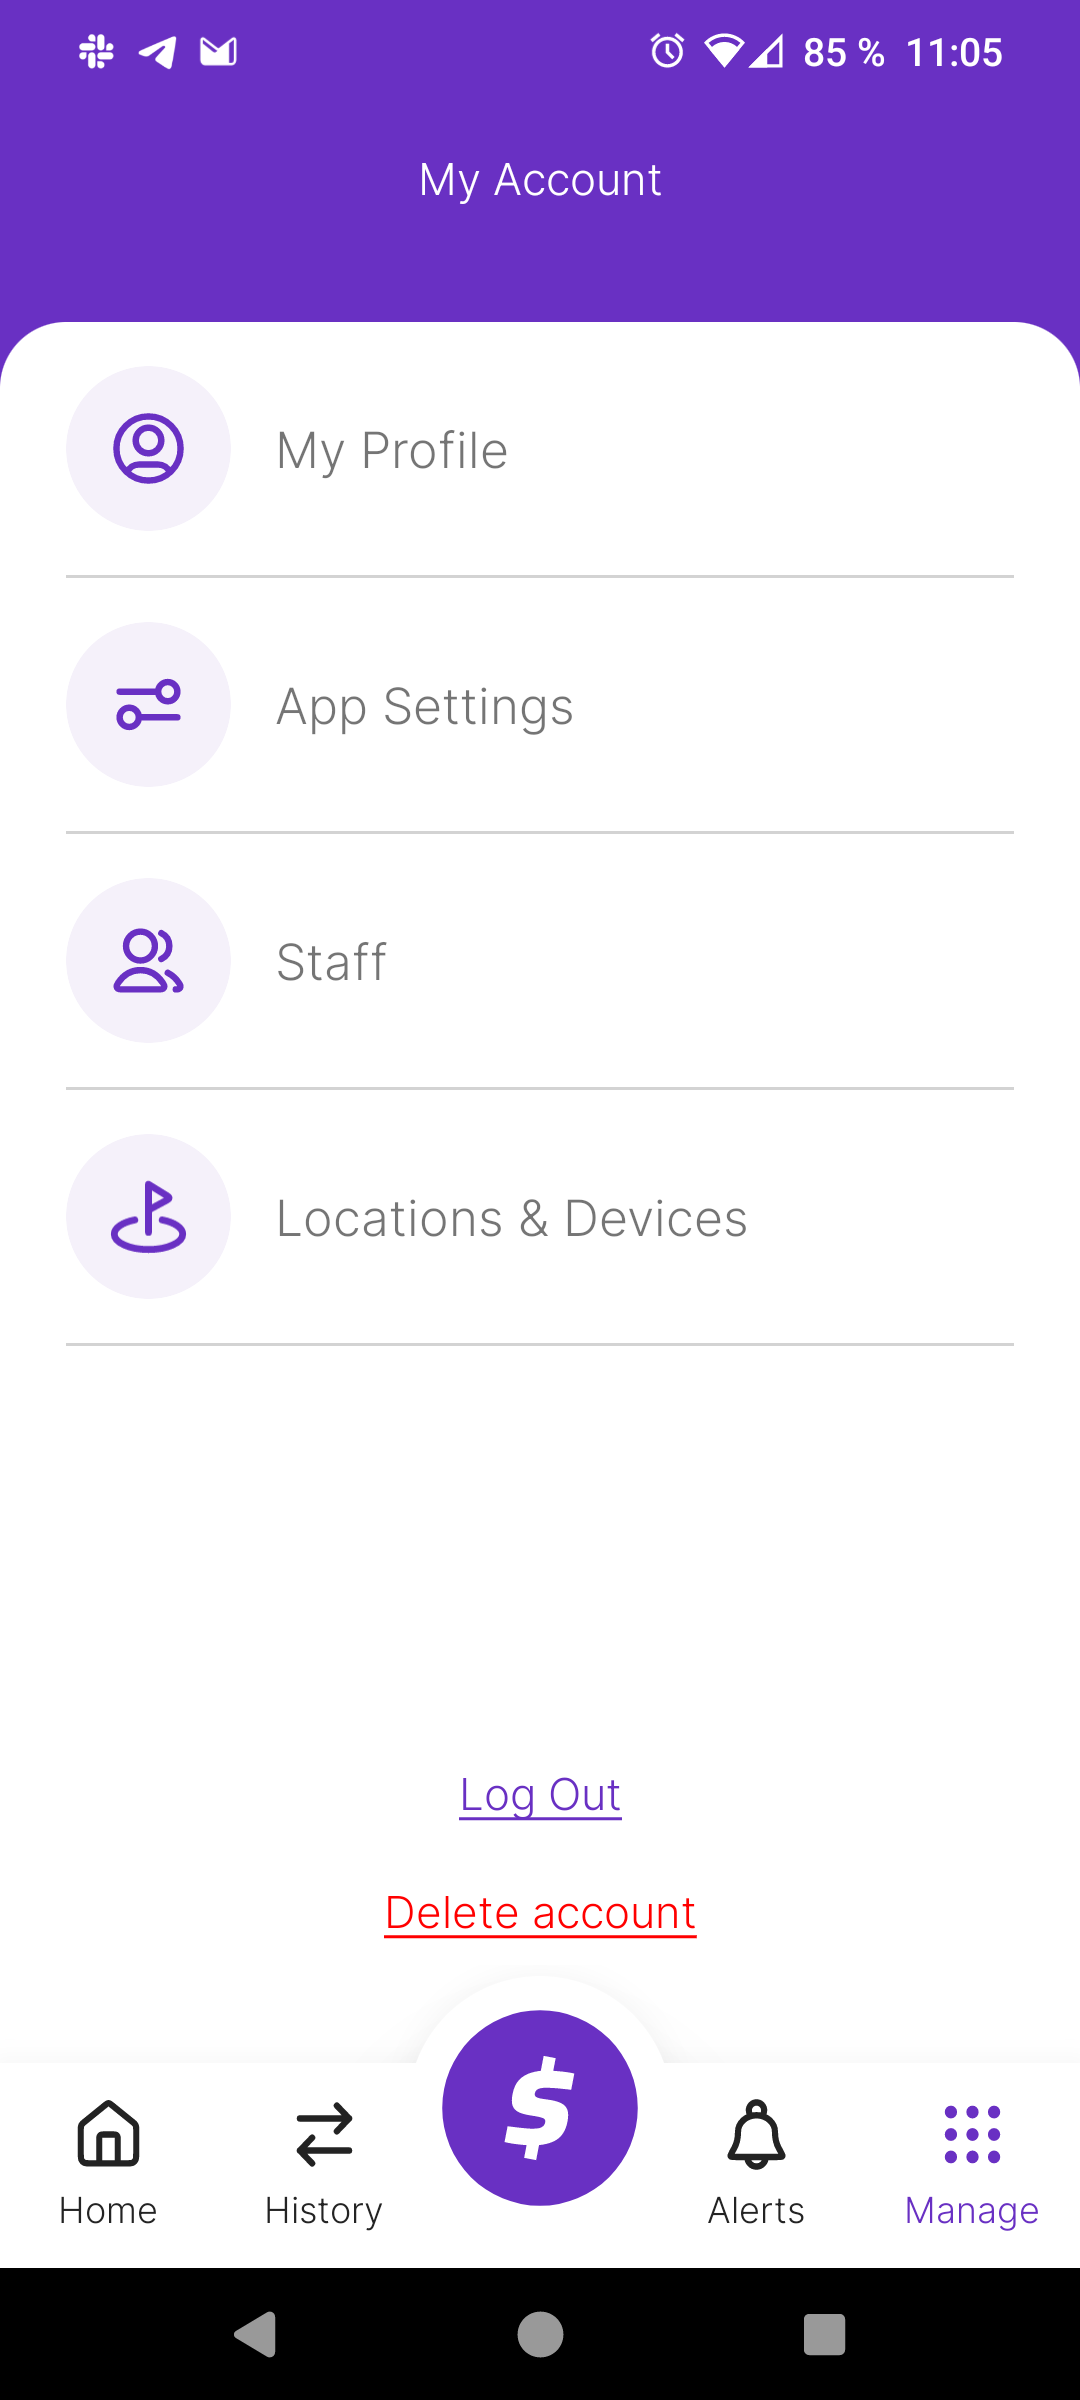
By default, the session will expire 90 days after the login. You can log in again after the log-out as you want. To log out of your session, you can click on the Log out option inside of "My Account":
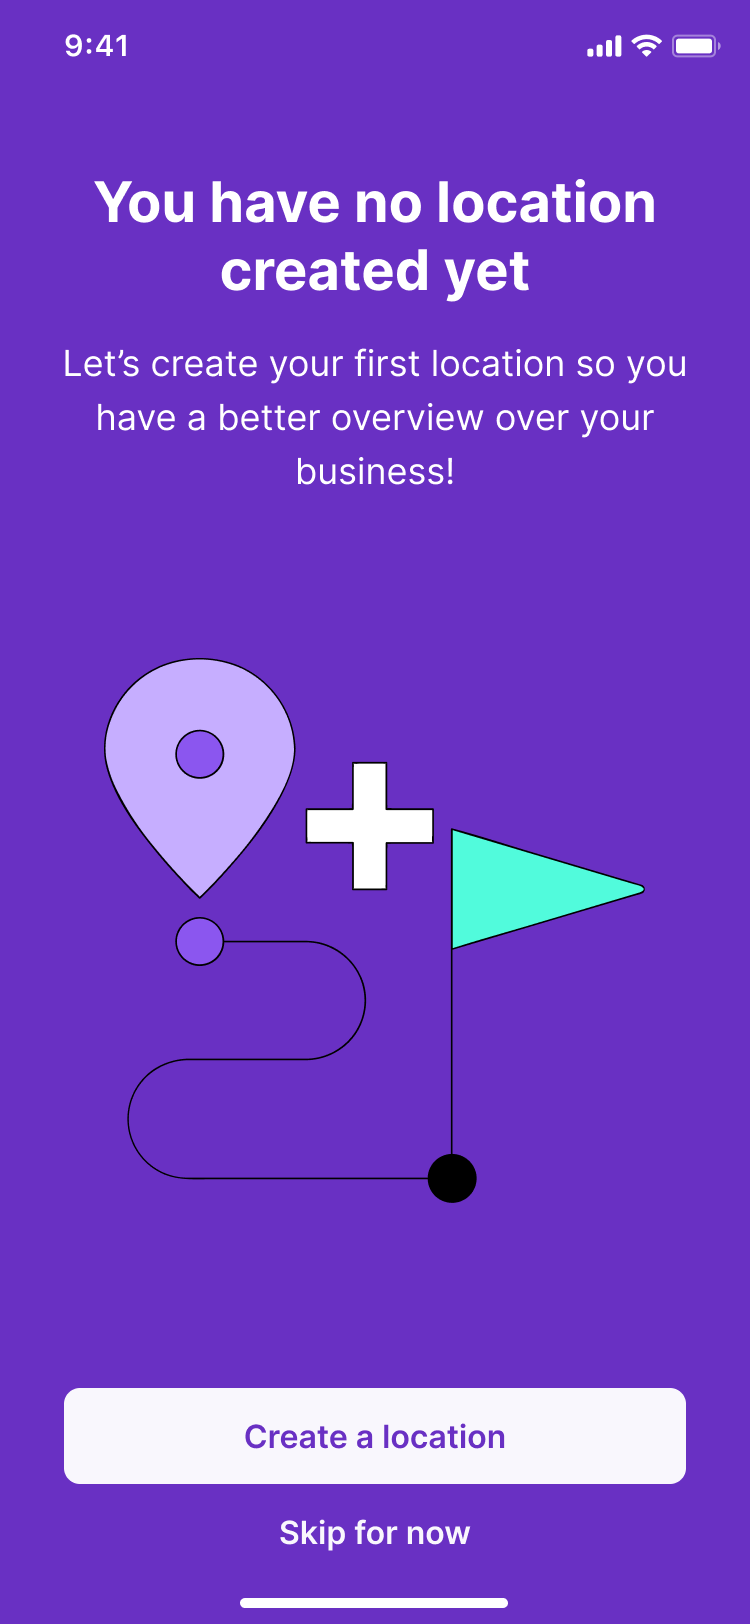
First Login and First Location
When you register for the Sylq App or log in for the first time, the Sylq App will show you a process for creating the First Location and, at the same time, will invite you to register the Device from which you are doing the process. Let's see:
First Location
When you arrive for the first time, we will invite you to Create your First Location. You will be guided at all times and it will be very easy to complete. Please follow the steps that we will show you on the screen and you will have your first location in a few seconds.
First Device & Assign to a Location
Once you have created the Location, it will be time to Name your new Device. This name will allow you to recognize it and also send remote payments if you wish.
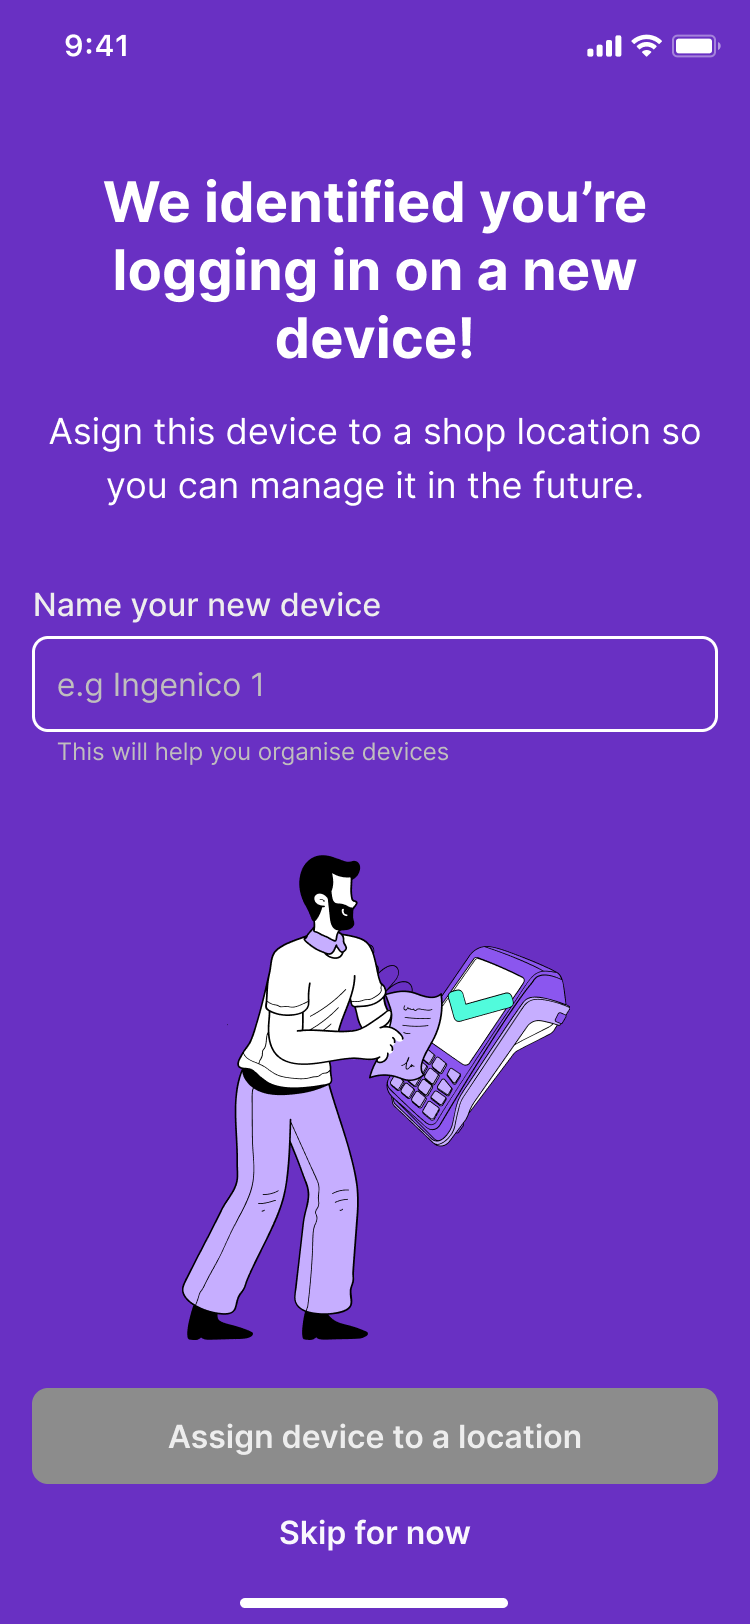
The last step, will be to assign the new device to the new location and everything will be ready for you to start receiving payments.
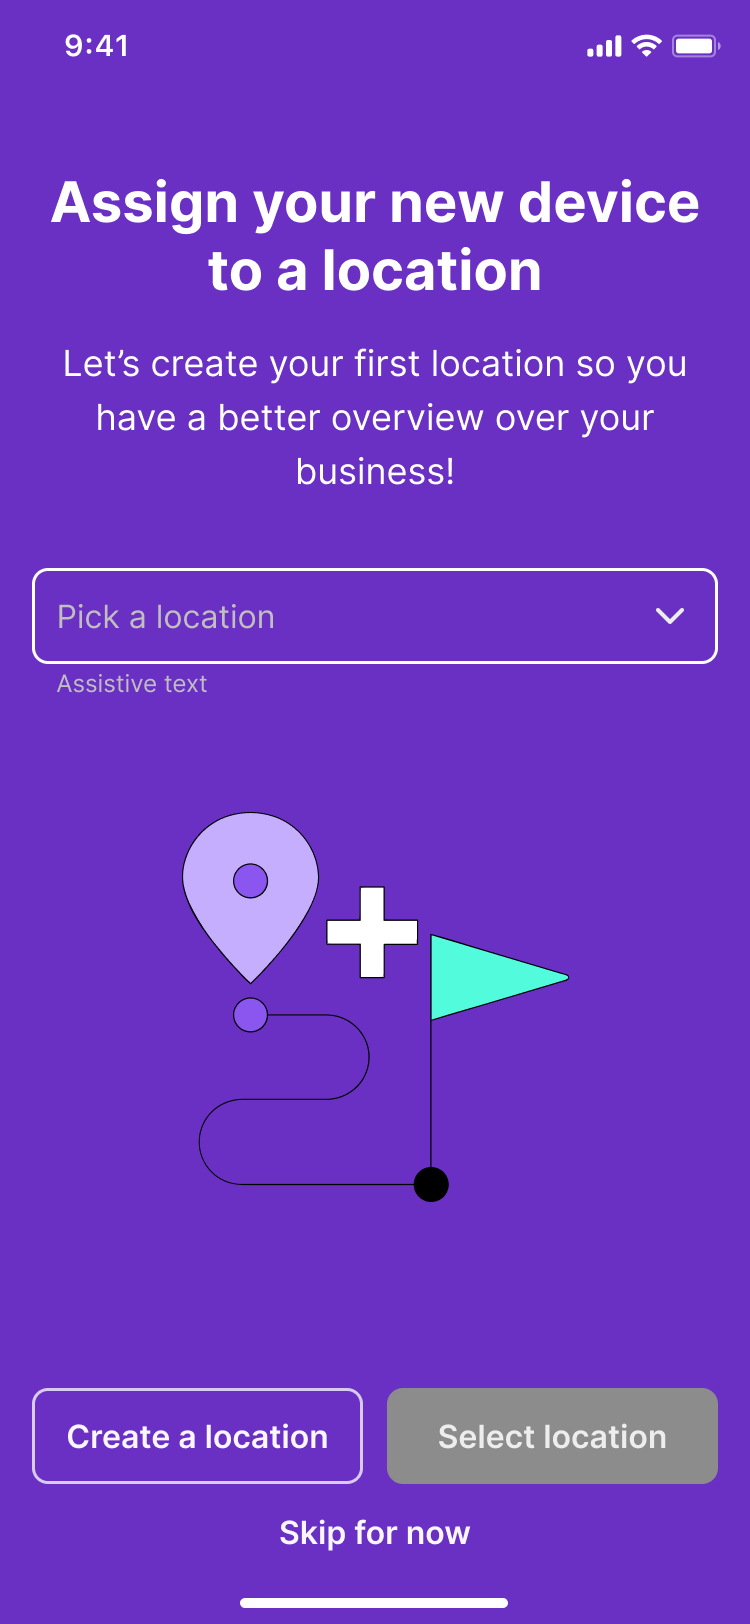
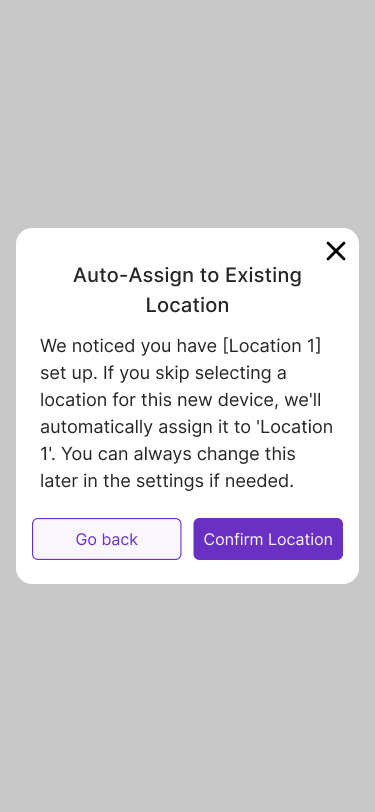
If for some reason you don't want to continue, you can Skip for now and it will auto-assign the device to a location.
Launch a Payment
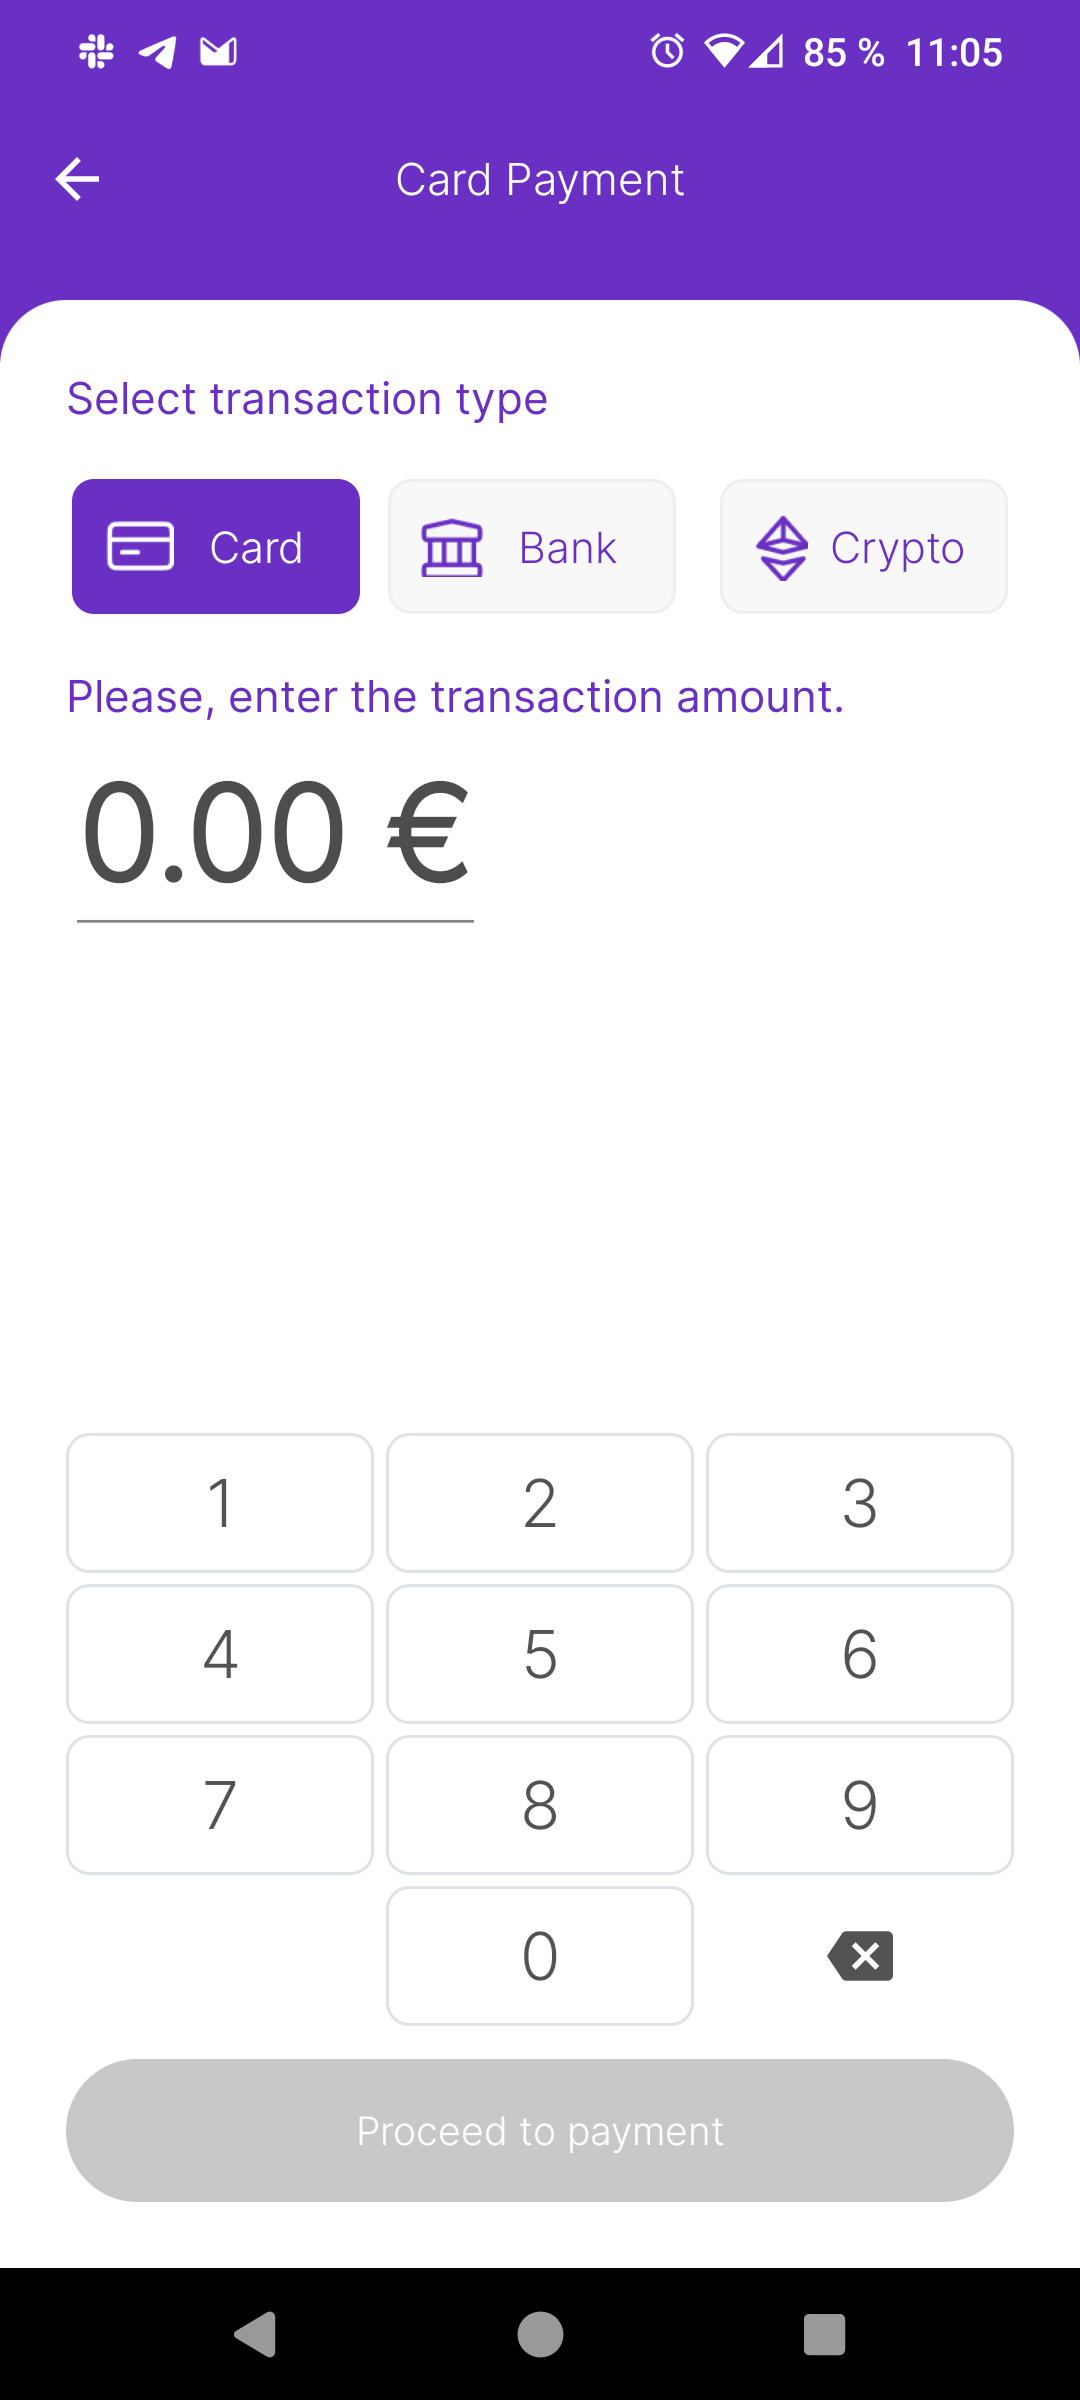
If you want to launch a Payment (Card, Bank or Crypto payment) you can click the Money Icon on the Main screen and immediately next you will be redirected to the payments page:
In the new page you will select between Card, Bank or Crypto payment, please indicate the Amount by the virtual keyboard and you can launch the payment:
For example, if your option is a Bank or Crypto payment, the Sylq App will display you a QR code, now the payer can scan it and proceed to paid. If you want, you can send the payment by email or SMS (pay by link), click please on the "Send link via SMS or email" and you will indicate the phone number or email address.

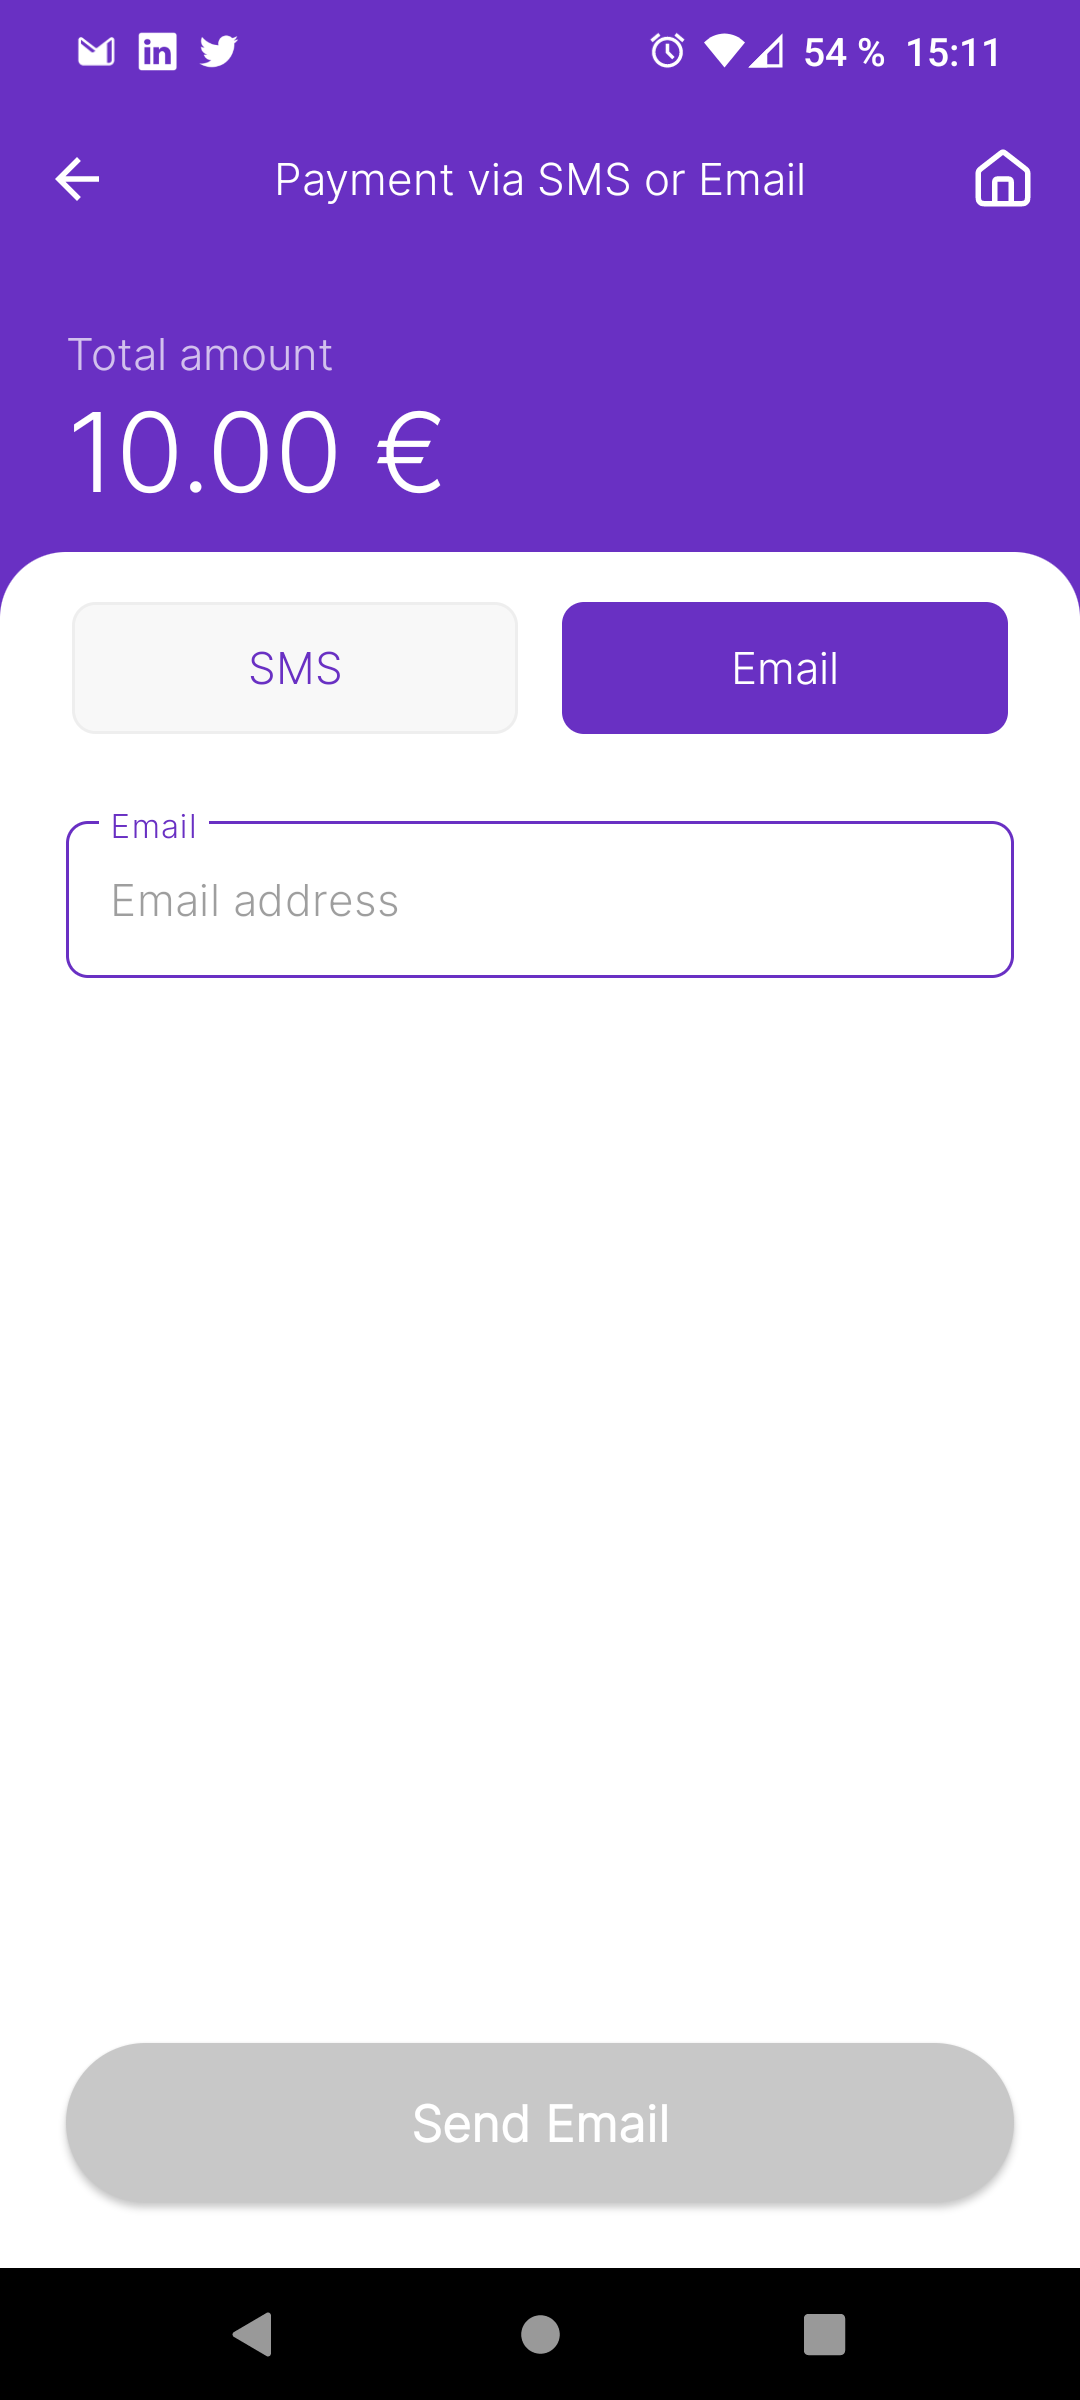
Payment via SMS or Email
If you need to send it by SMS or Email, it is necessary to click at Send ink via sms or email and the App will be redirected you to the screen to manage the sending.
Payment via SMS

Payment via Email
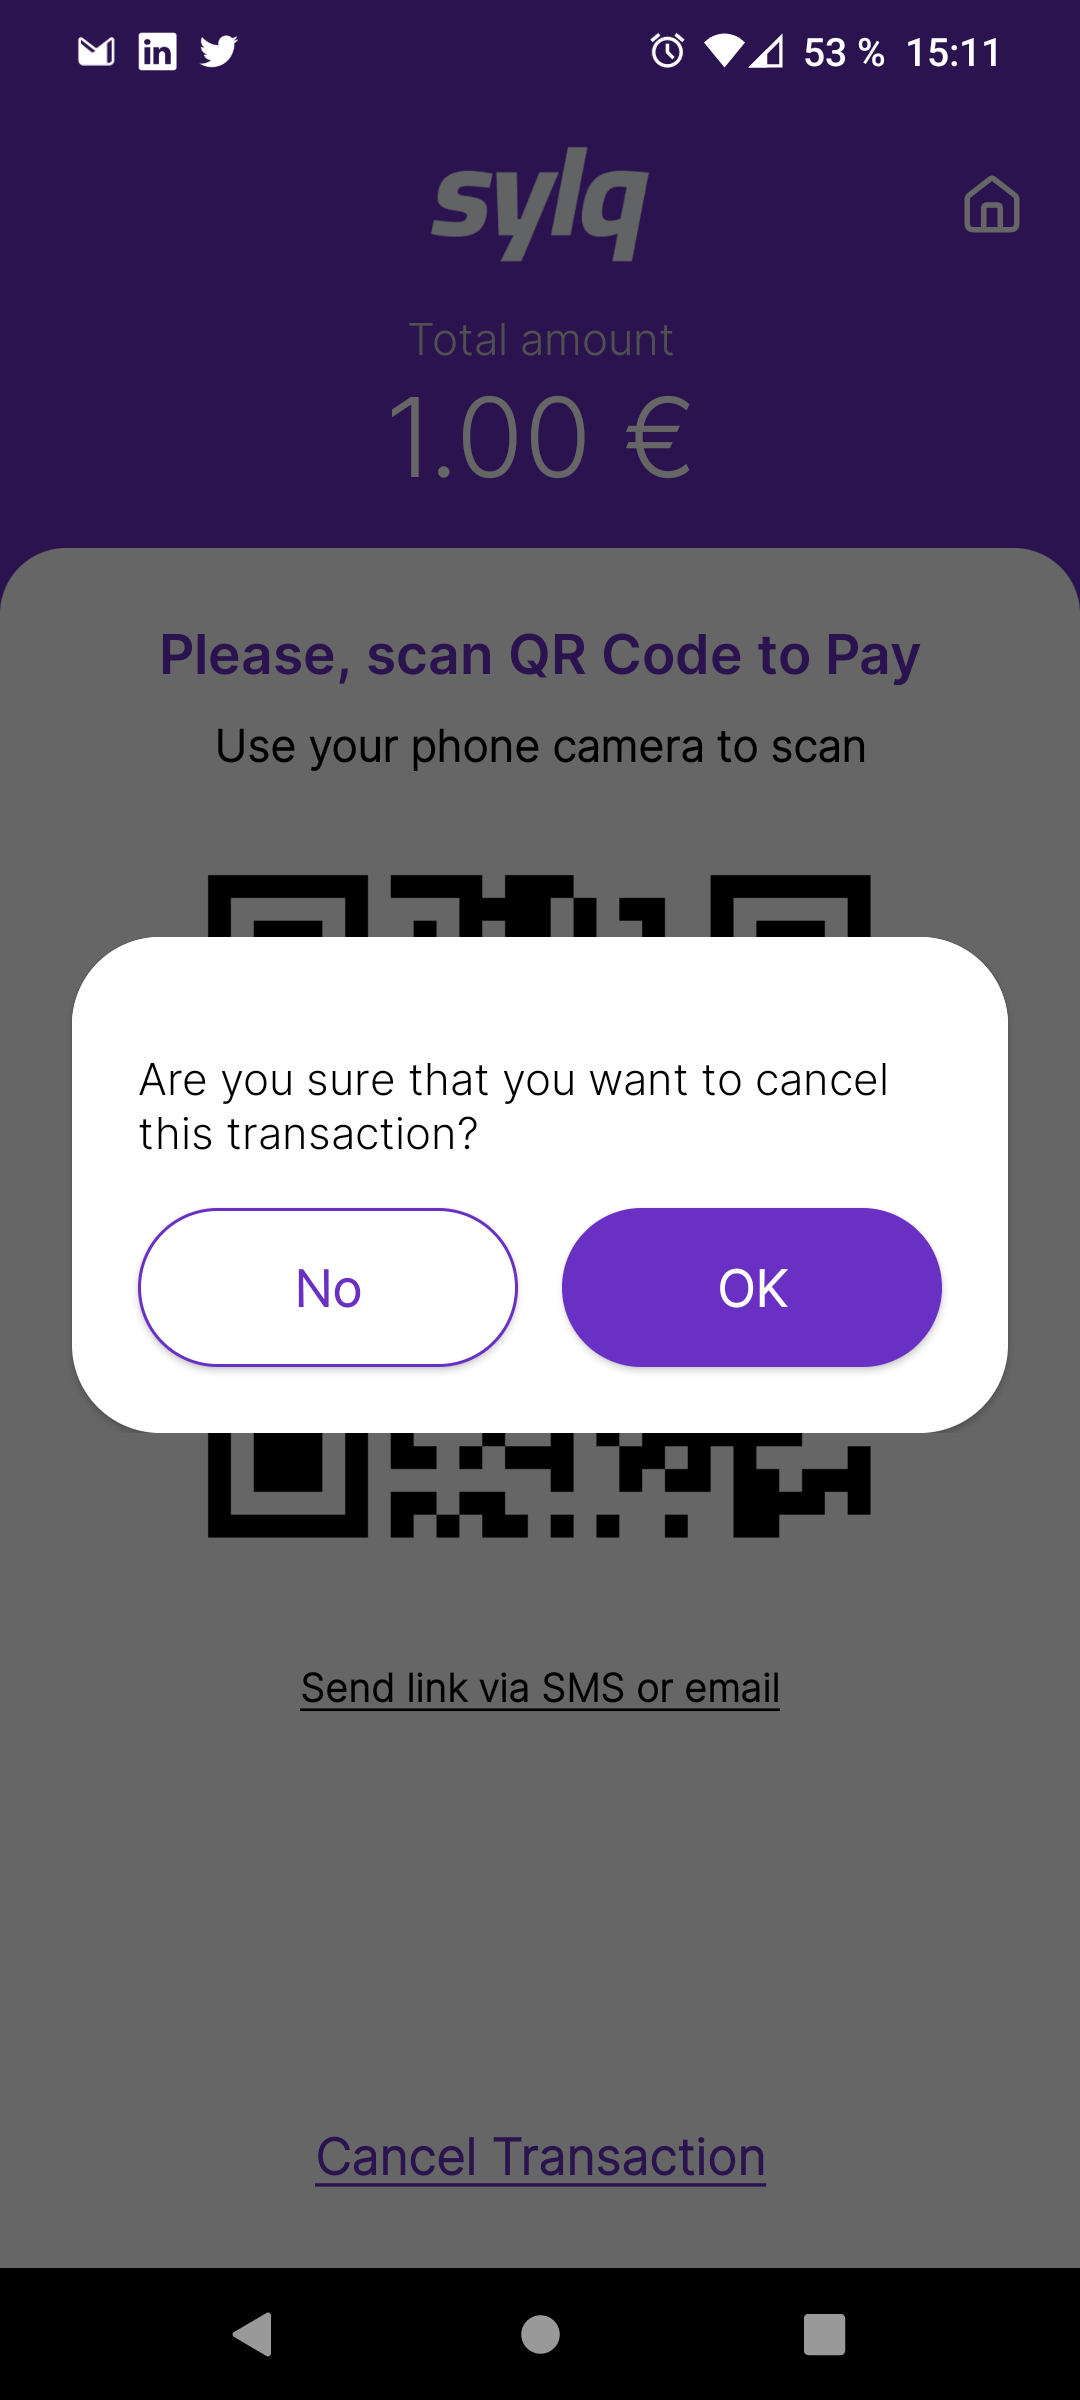
Cancel a Payment
At any time you can cancel the payment, it is only necessary to click on Cancel Transaction and the application will cancel it for you:
Confirms (OK) the action and immediately the Transaction will be cancelled:
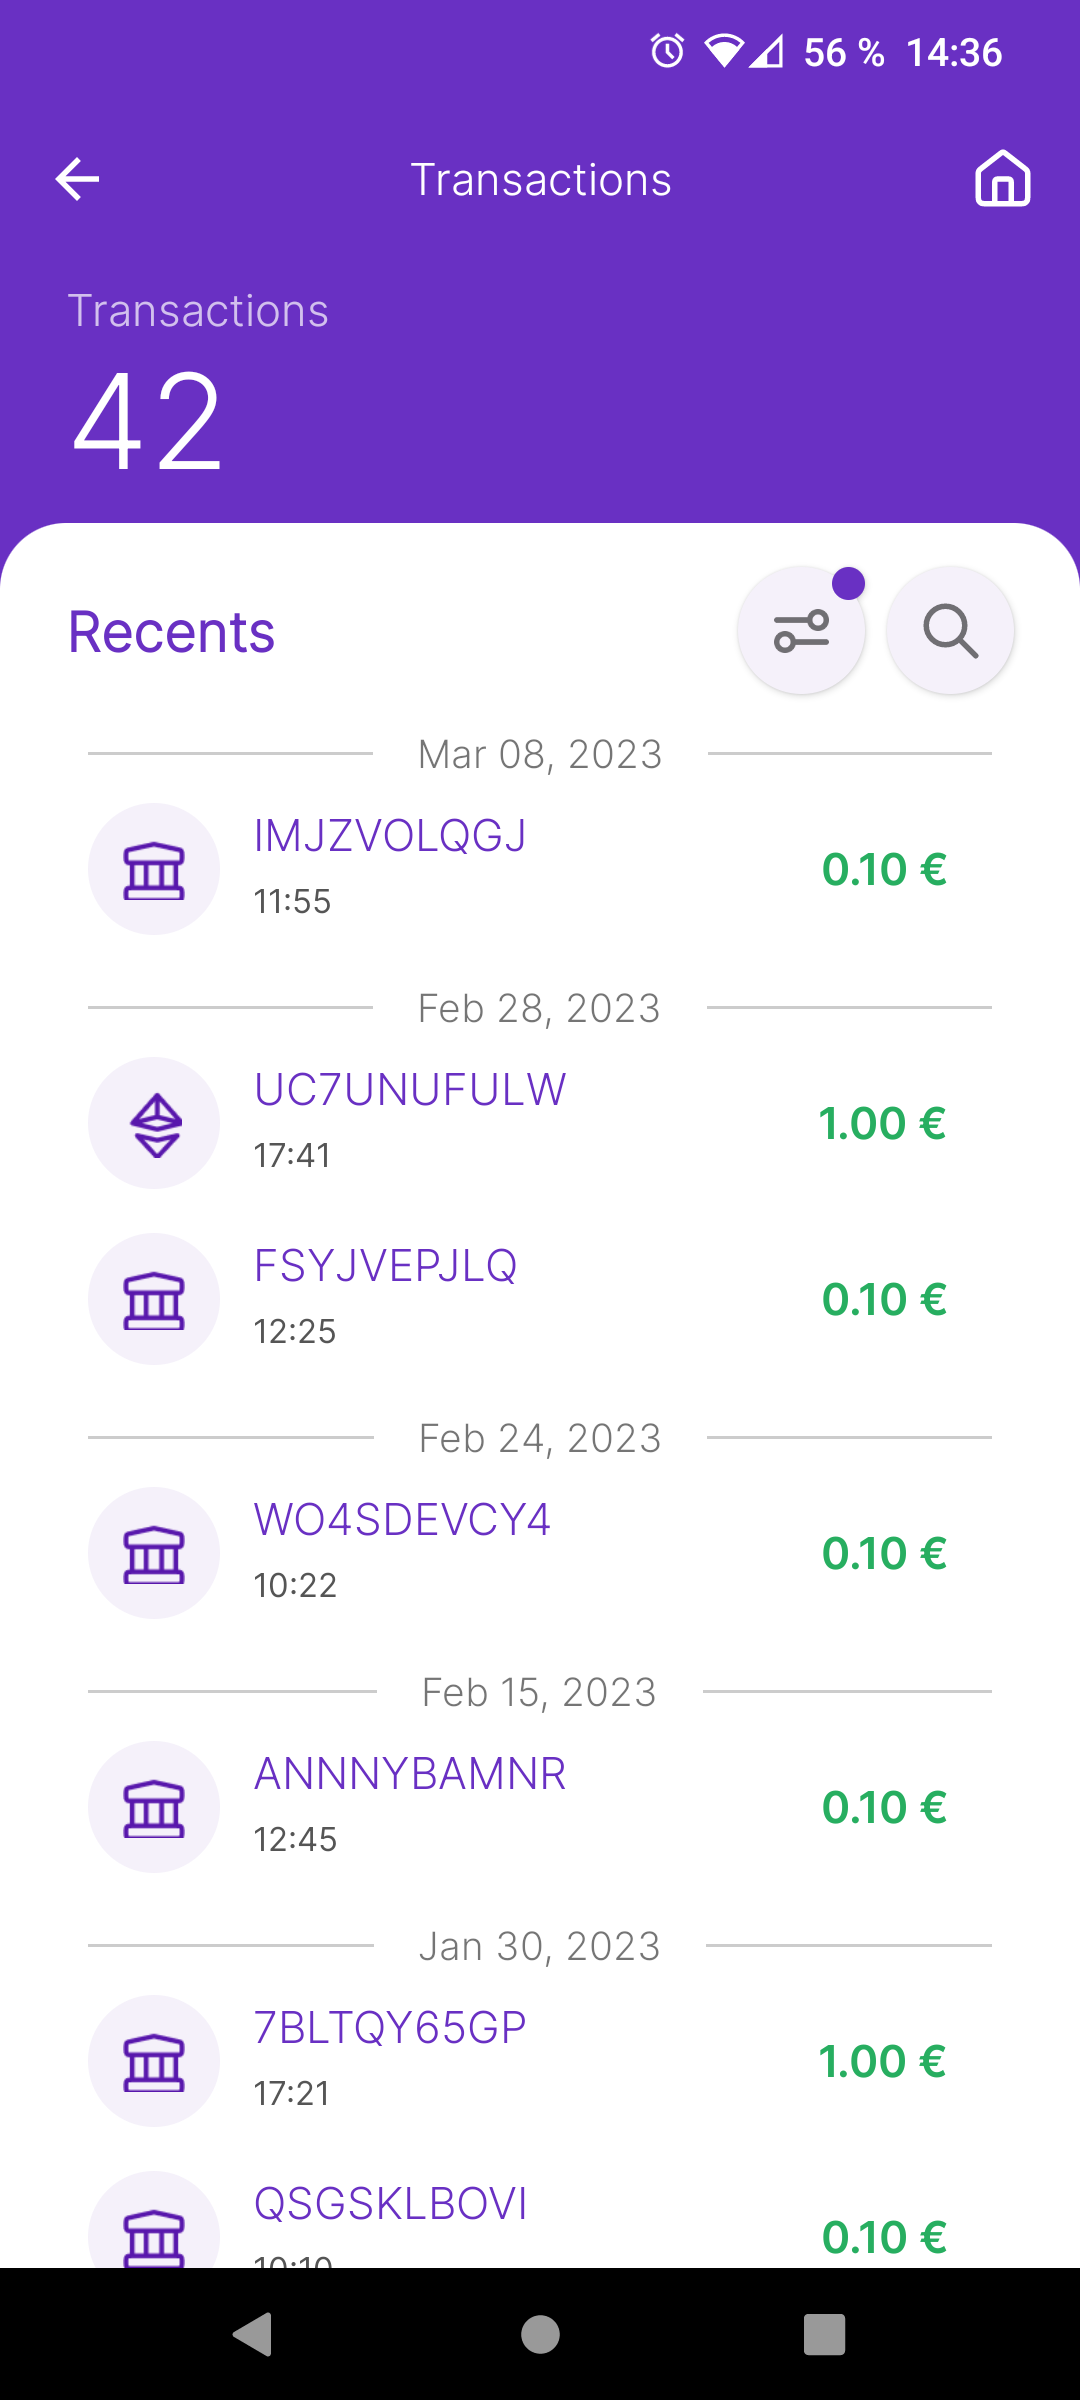
List of Transactions
If you want to List the Transactions you can select the option Transactions on the Staff Main screen and immediately next you will be redirected to the Transactions List page:
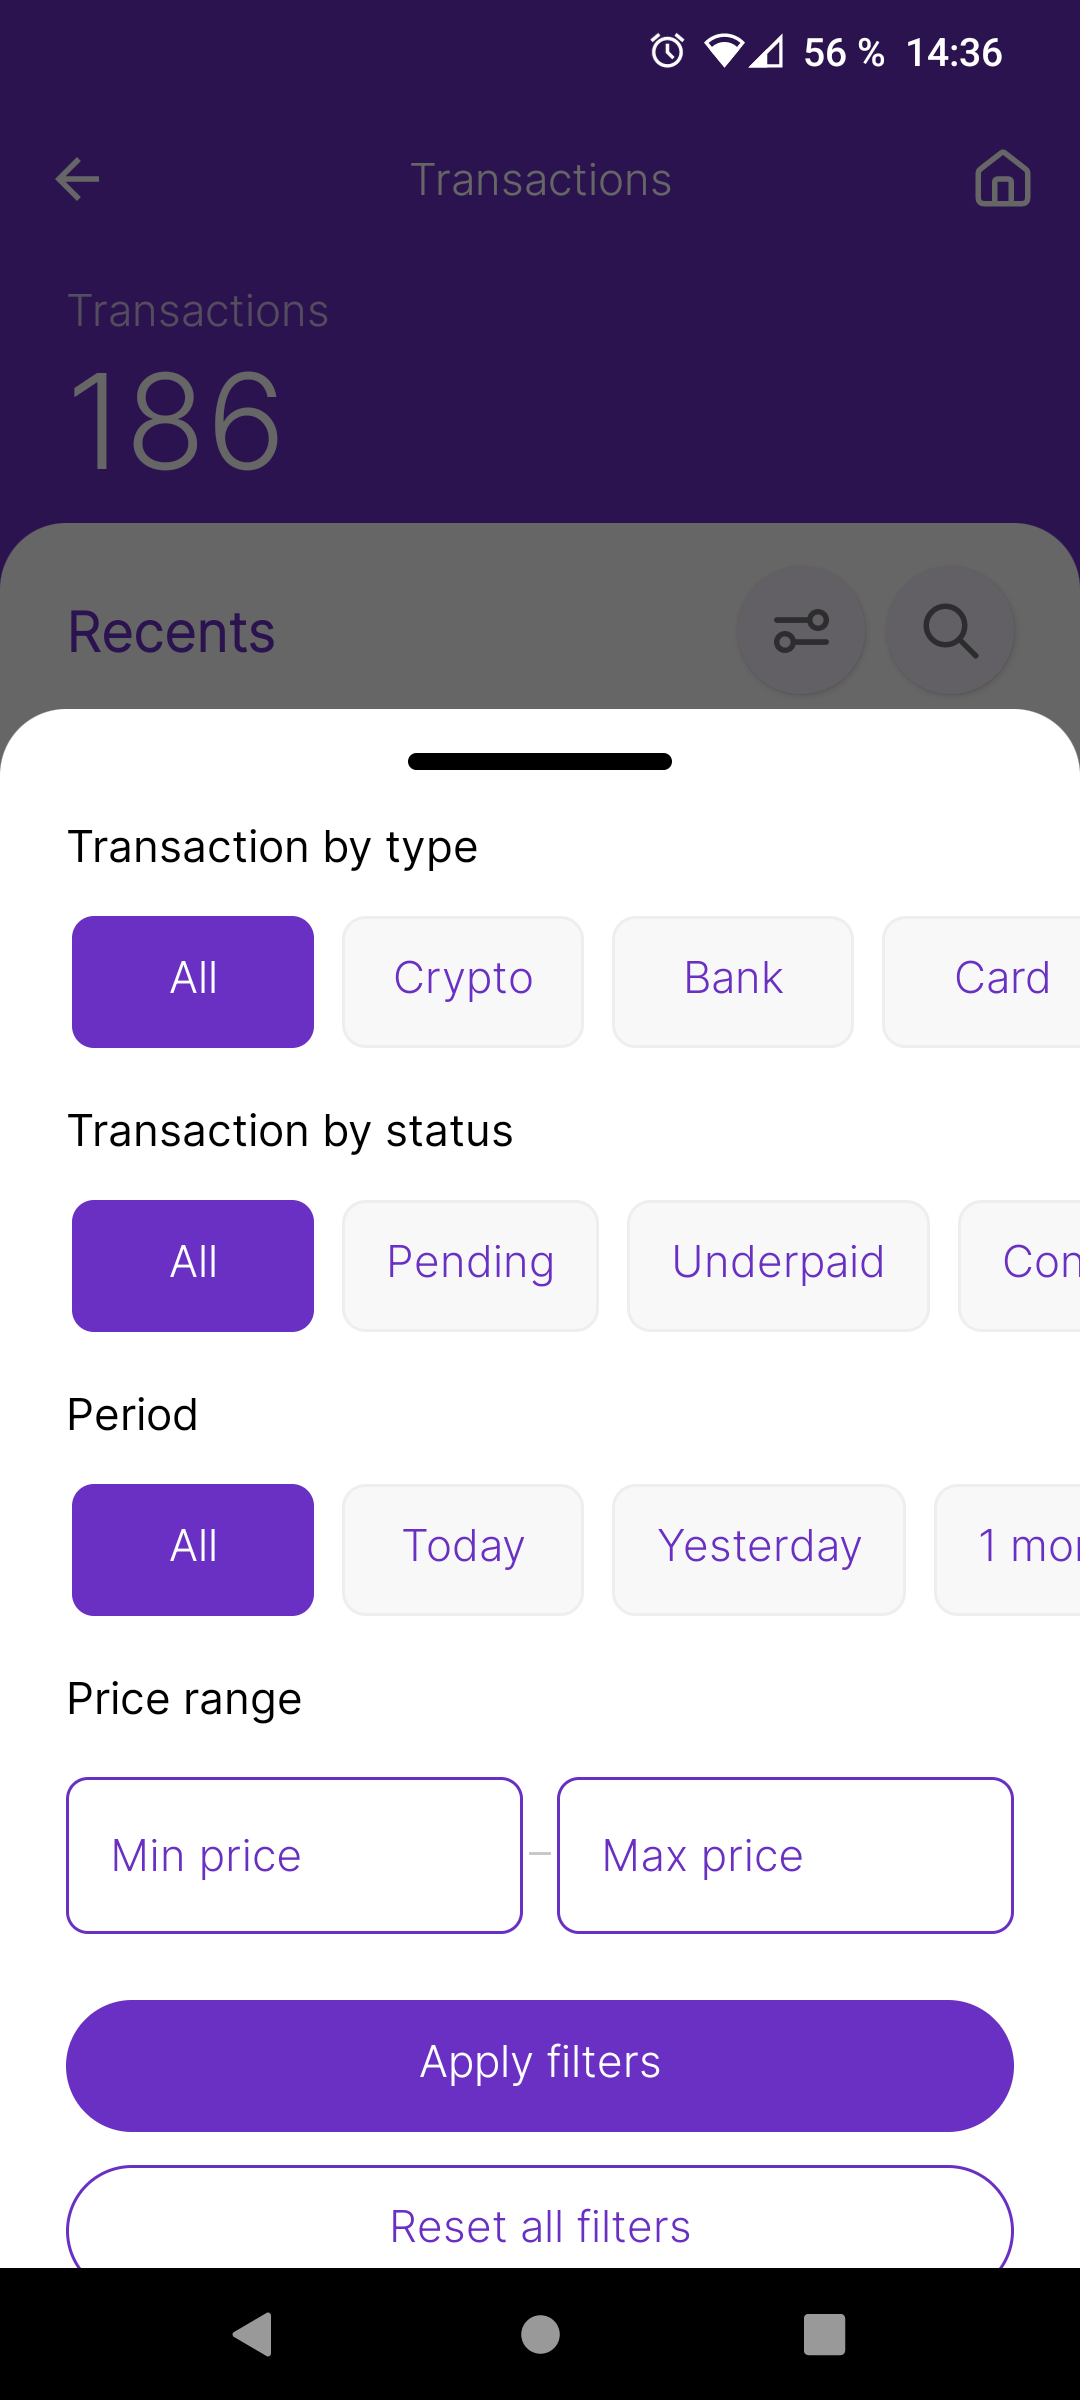
On the Transactions List page you can see the results and apply some Filters or Search a specific value at the Search box on the top:
In the List of Transactions you can apply Filters, by Time, by Period, by Status, etc... you will only have to choose your preference in the options menu on the top left: by date...
If you need to see more details about one transaction, you can click on the same transaction and will be redirected to the next screen, where you can see the details of the transaction:
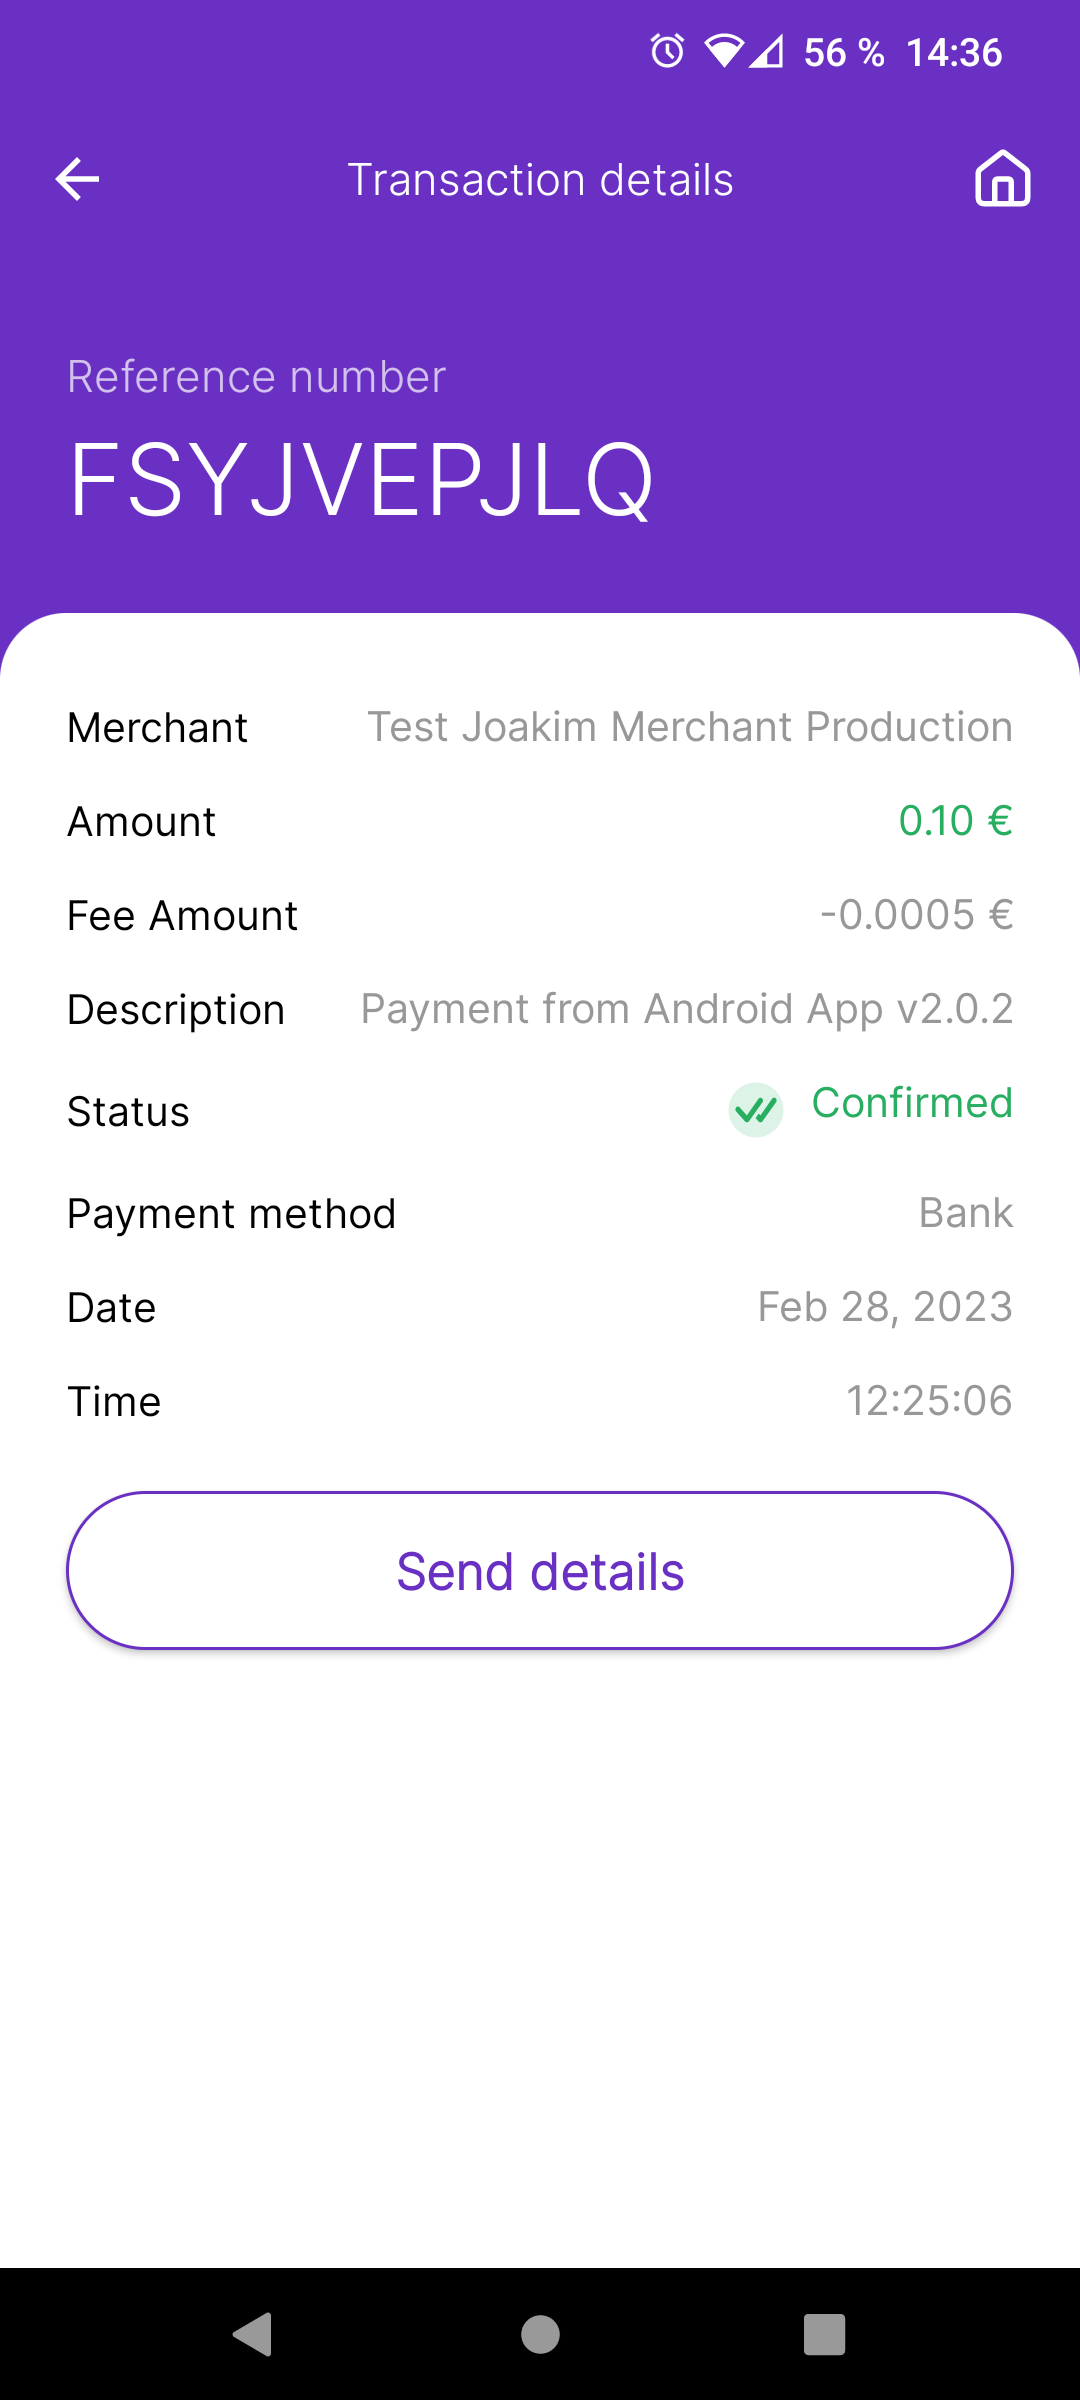
Note: In payment terminals like PAX, you can also print customer and merchant receipts or send them by email or SMS.
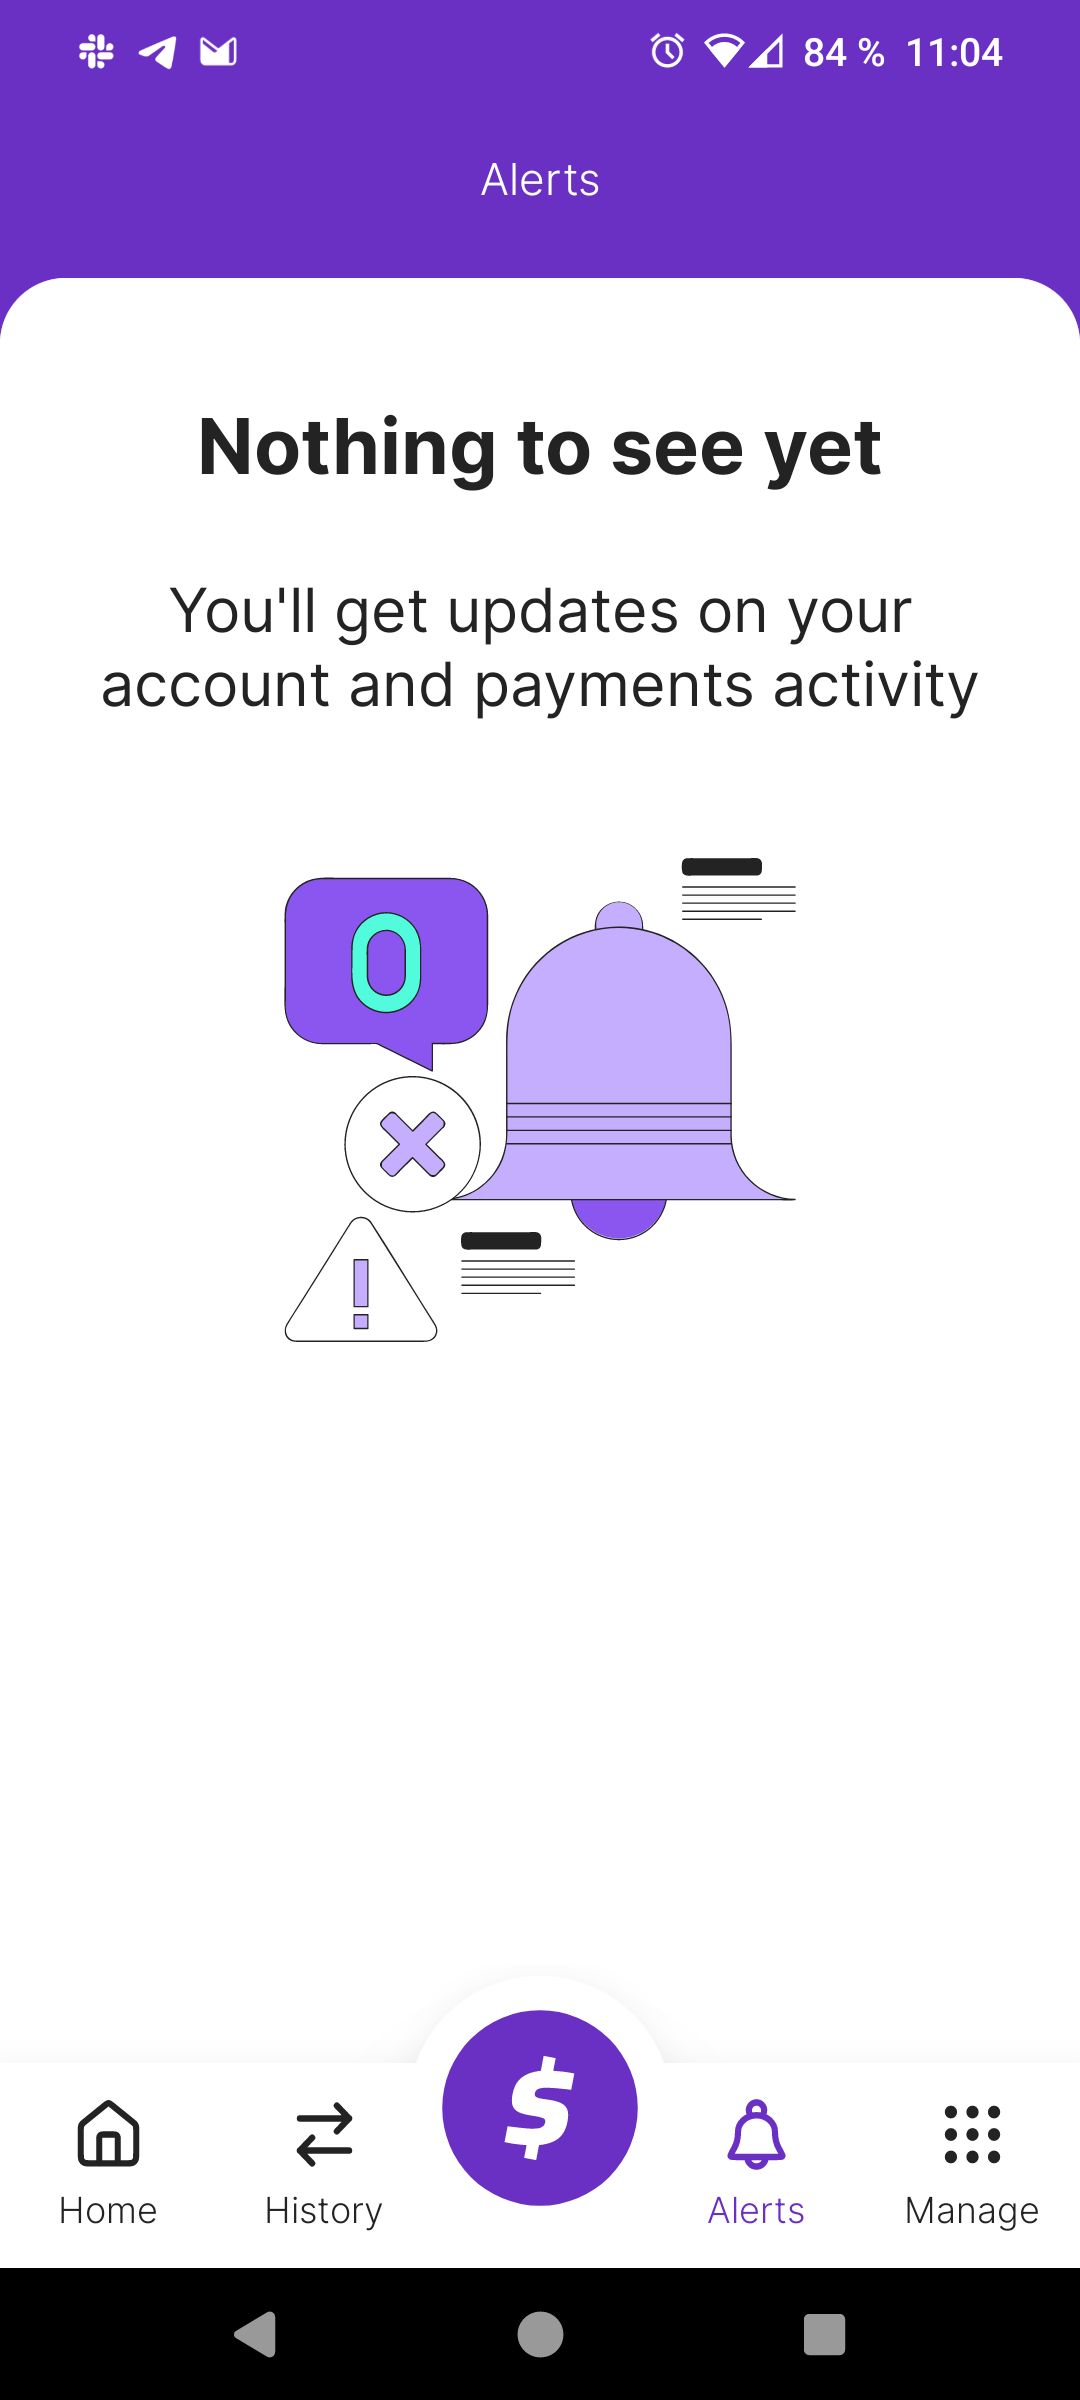
Alerts
The Alerts area is reserved for those notifications that we can send you to communicate with you:
My Account, managing my profile and preferences
If you want to manage your profile and preferences, you can do it from My Account, where you can find and manage your My Profile, your App Settings where for example you can set the Locale values as your Language, your Currency and your Time Zone, yours Staff (List of Members of your Staff) and yours Locations & Devices
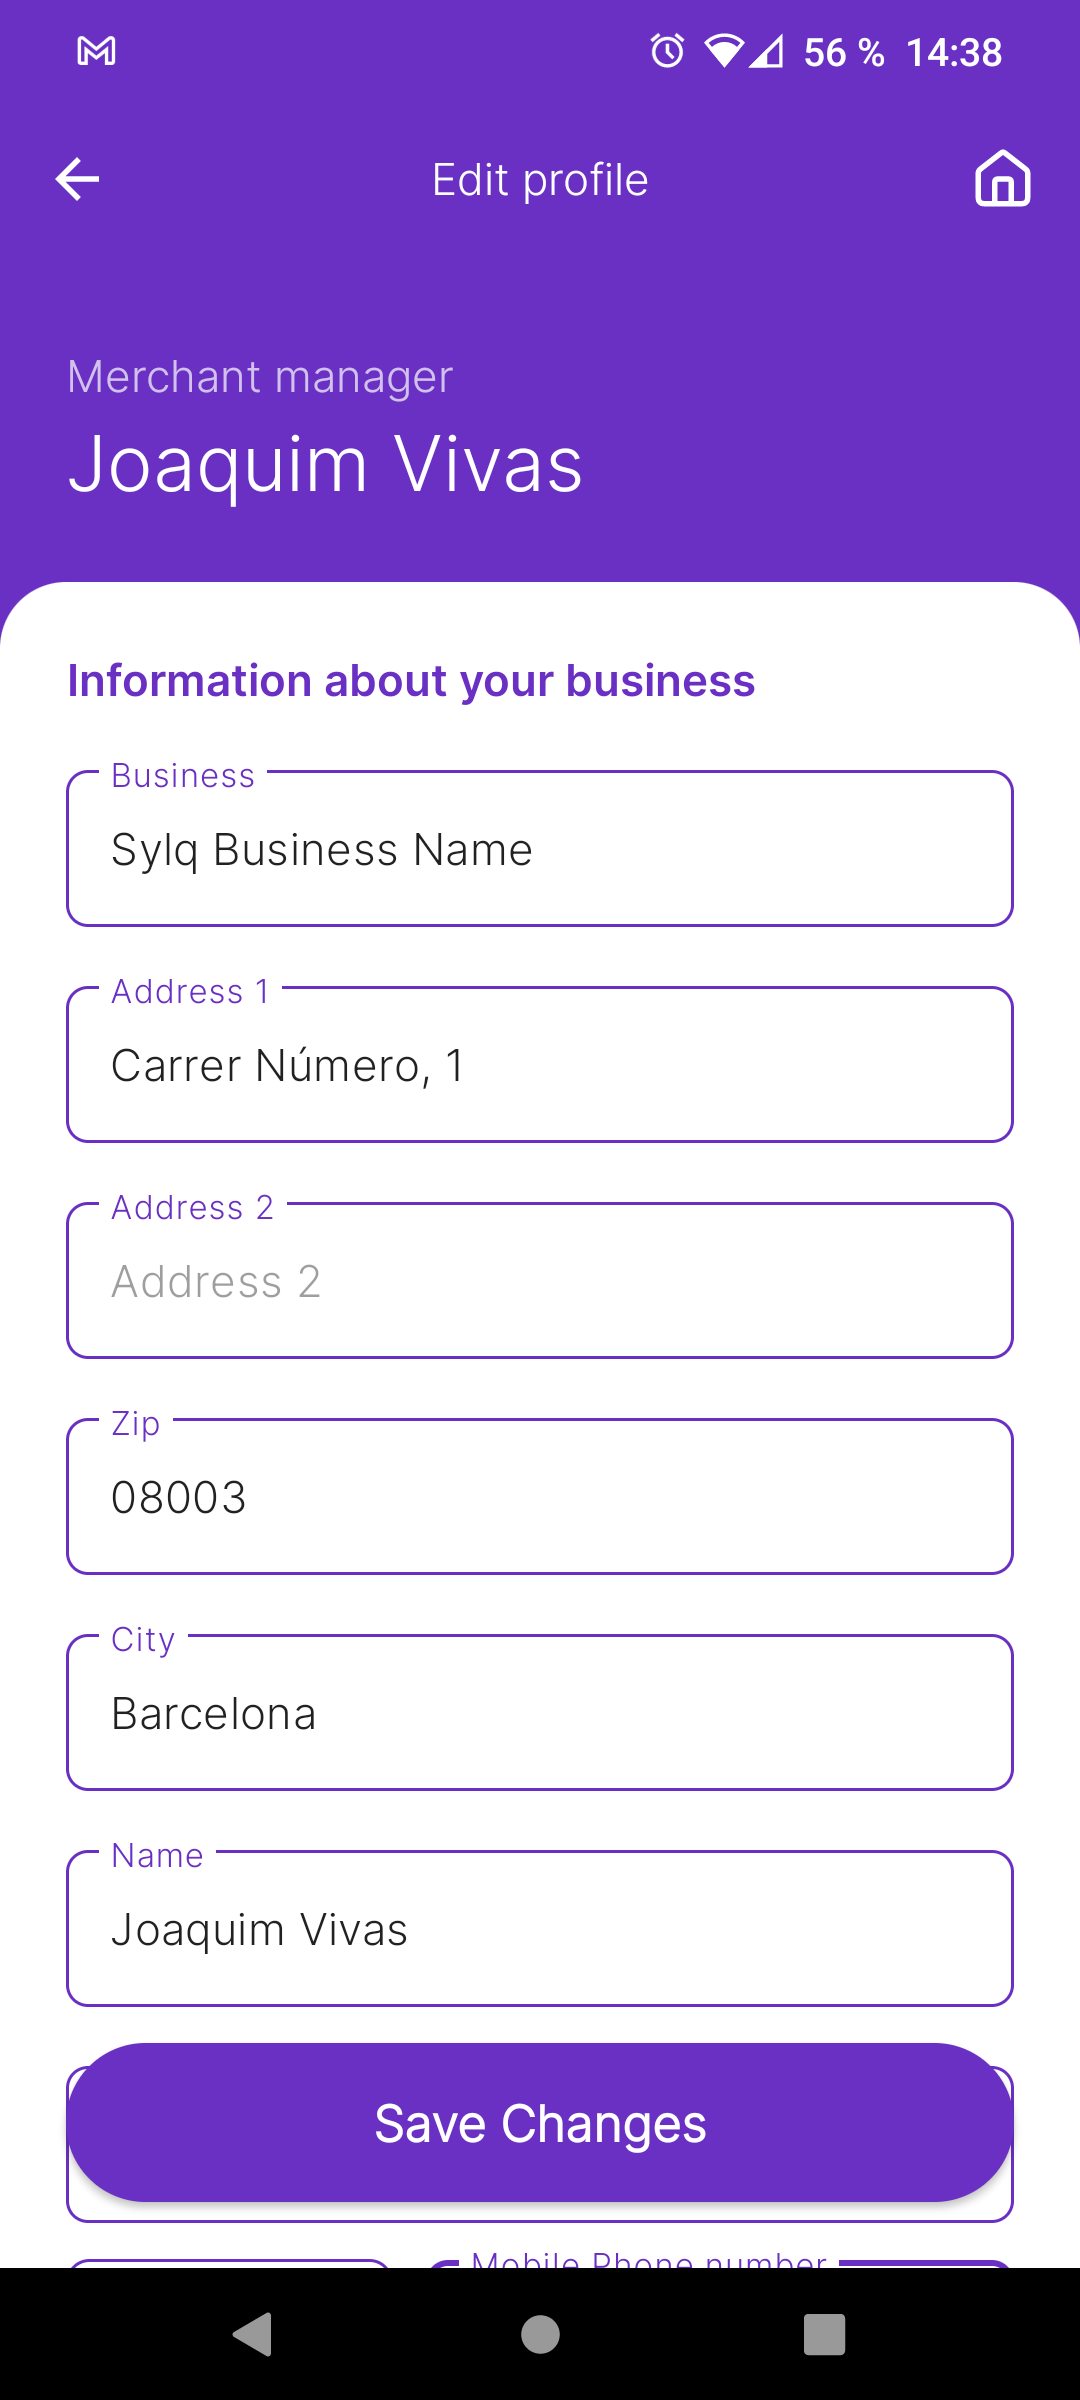
My Profile
In My Profile you can change all related to your Merchant, for example the Business Name, the Address, the City, etc...
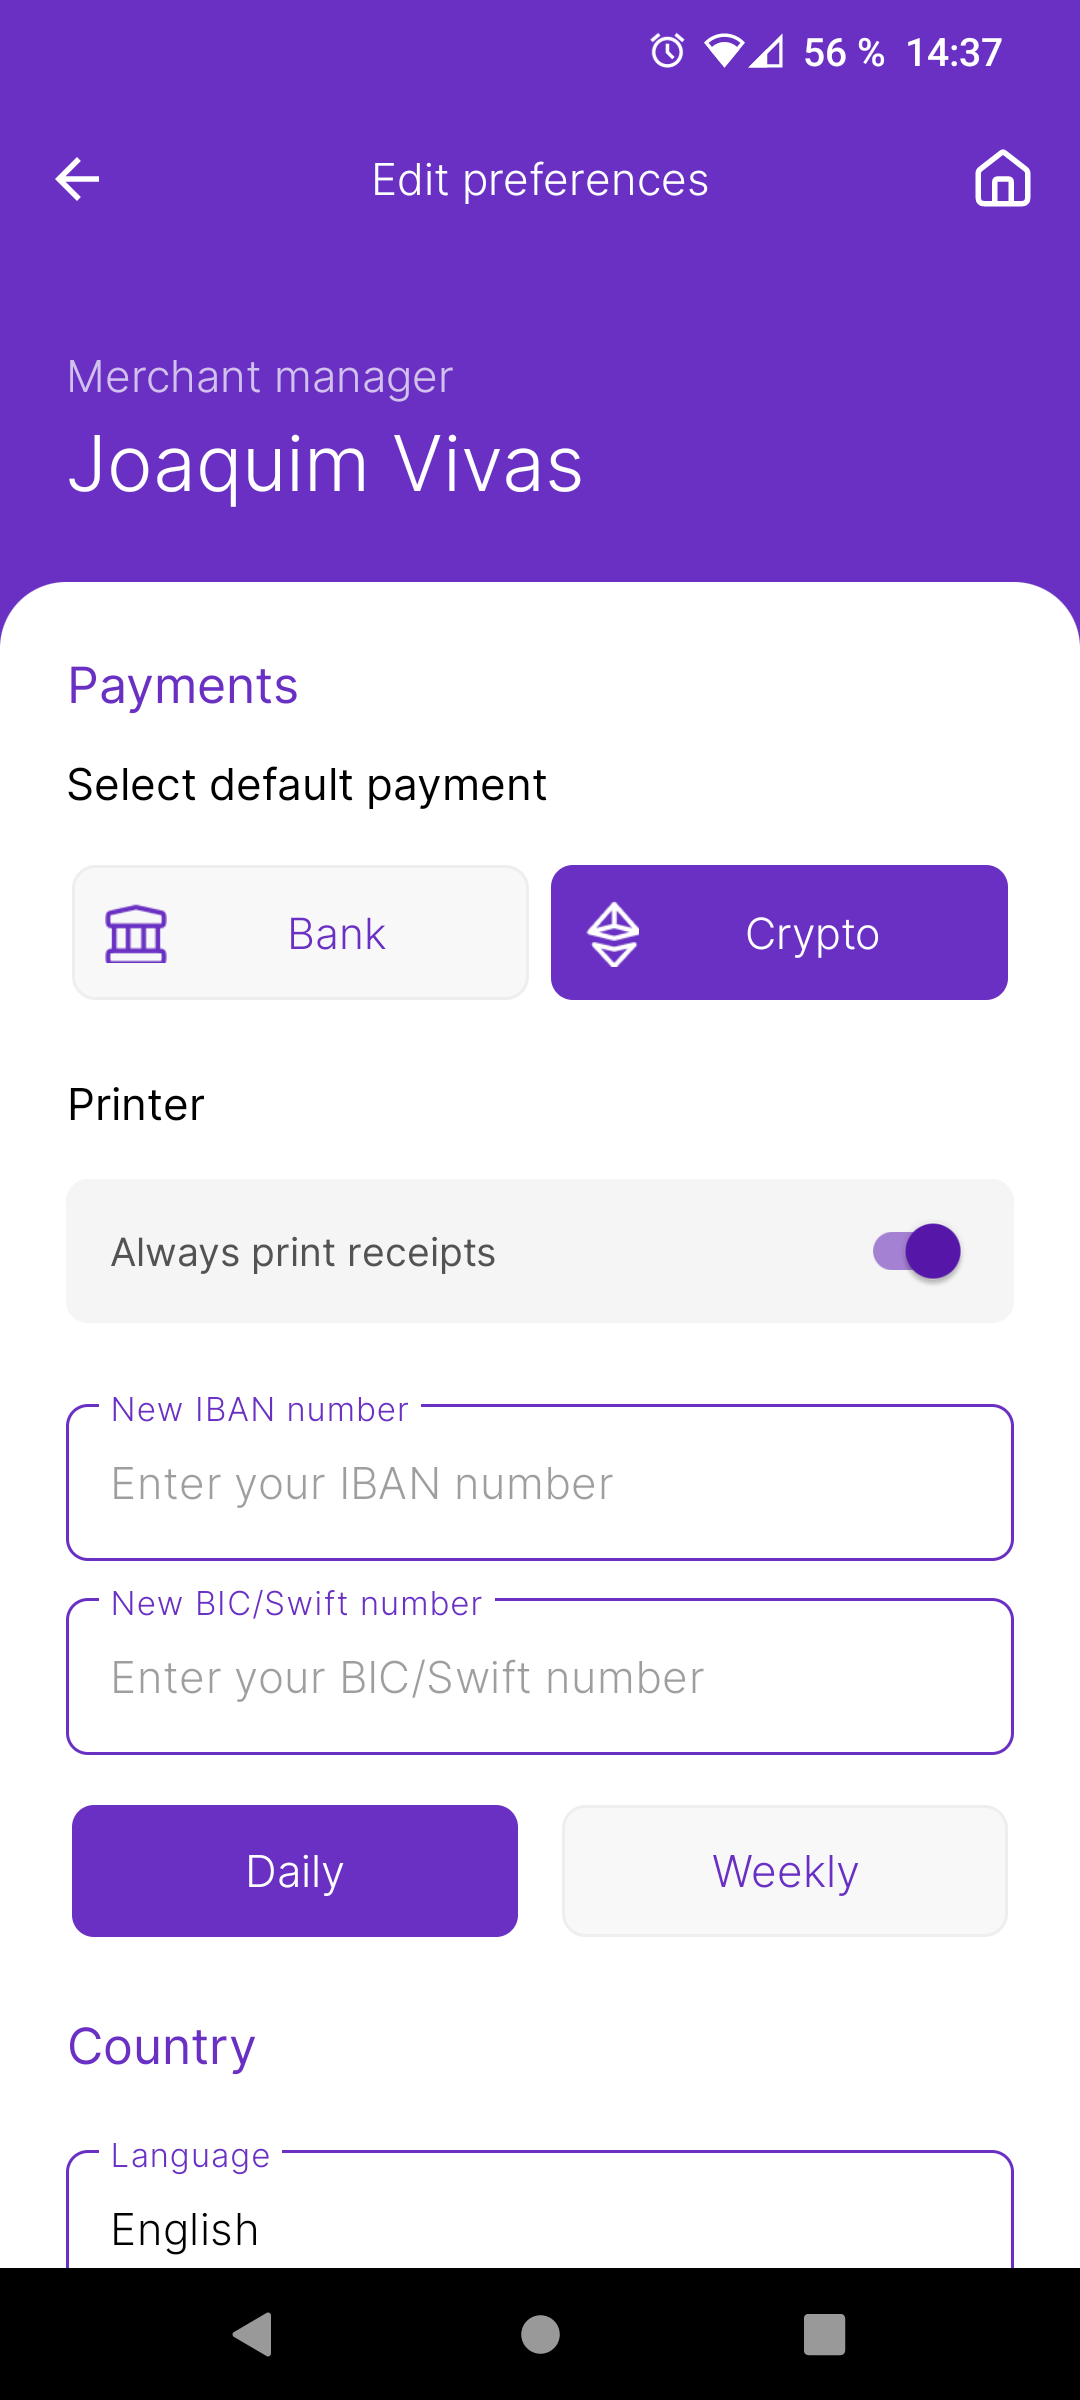
App Settings
In App Settings you can change your Preferences around the Default payment, the IBAN, the Language to display, etc...
Staff Members
If you need to Manage your Staff Members, you can List all, Display active only, Activate or Deactivate someone or Add a new member here (My Account / Staff):
For Add a new member you will be redirected to a new screen where the App asks will you for the Name and the email (as a user to log in). Automatically the App will send an email to the new Staff member with a temporal password. During the first login, the App will ask to change it (for security reasons).
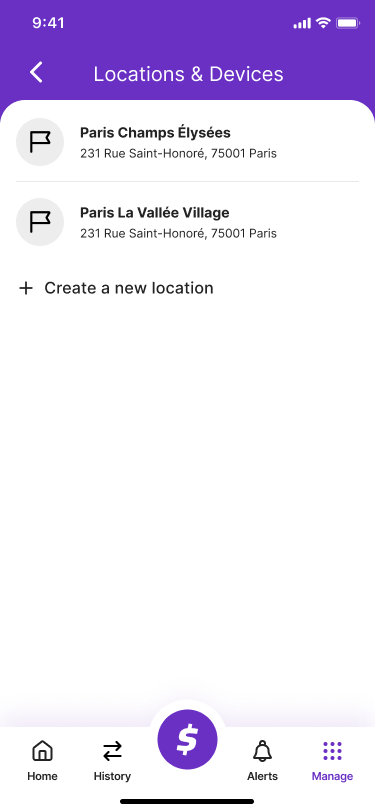
Locations & Devices
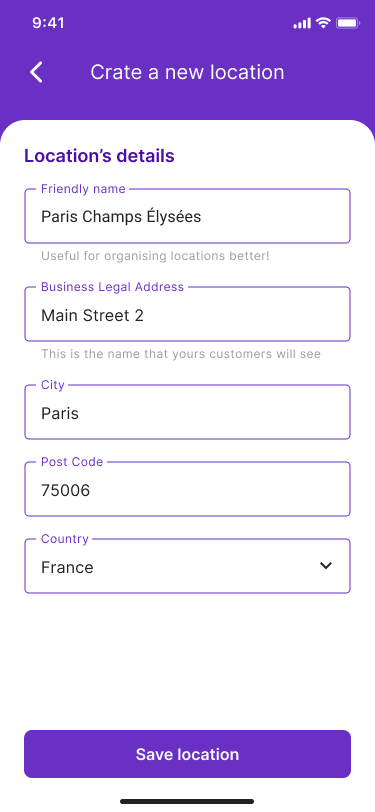
In Locations & Devices you can manage all related to your Locations and Devices, for example you can Add new Locations, Edit Locations, Delete Locations and the same for Devices, associate a Device to a New Location, Delete it, etc...
For example, the process of creating a new location is very simple, you will only need to fill out a few details:
Managing the IBAN for settlements
You can manage the IBAN for the settlements through the Manage section. You have four options in the menu, Home, History, Alerts and Manage, in the last option, Manage is where you can manage all your settings.
Please access the Manage option, and you will arrive at a new window with more options.
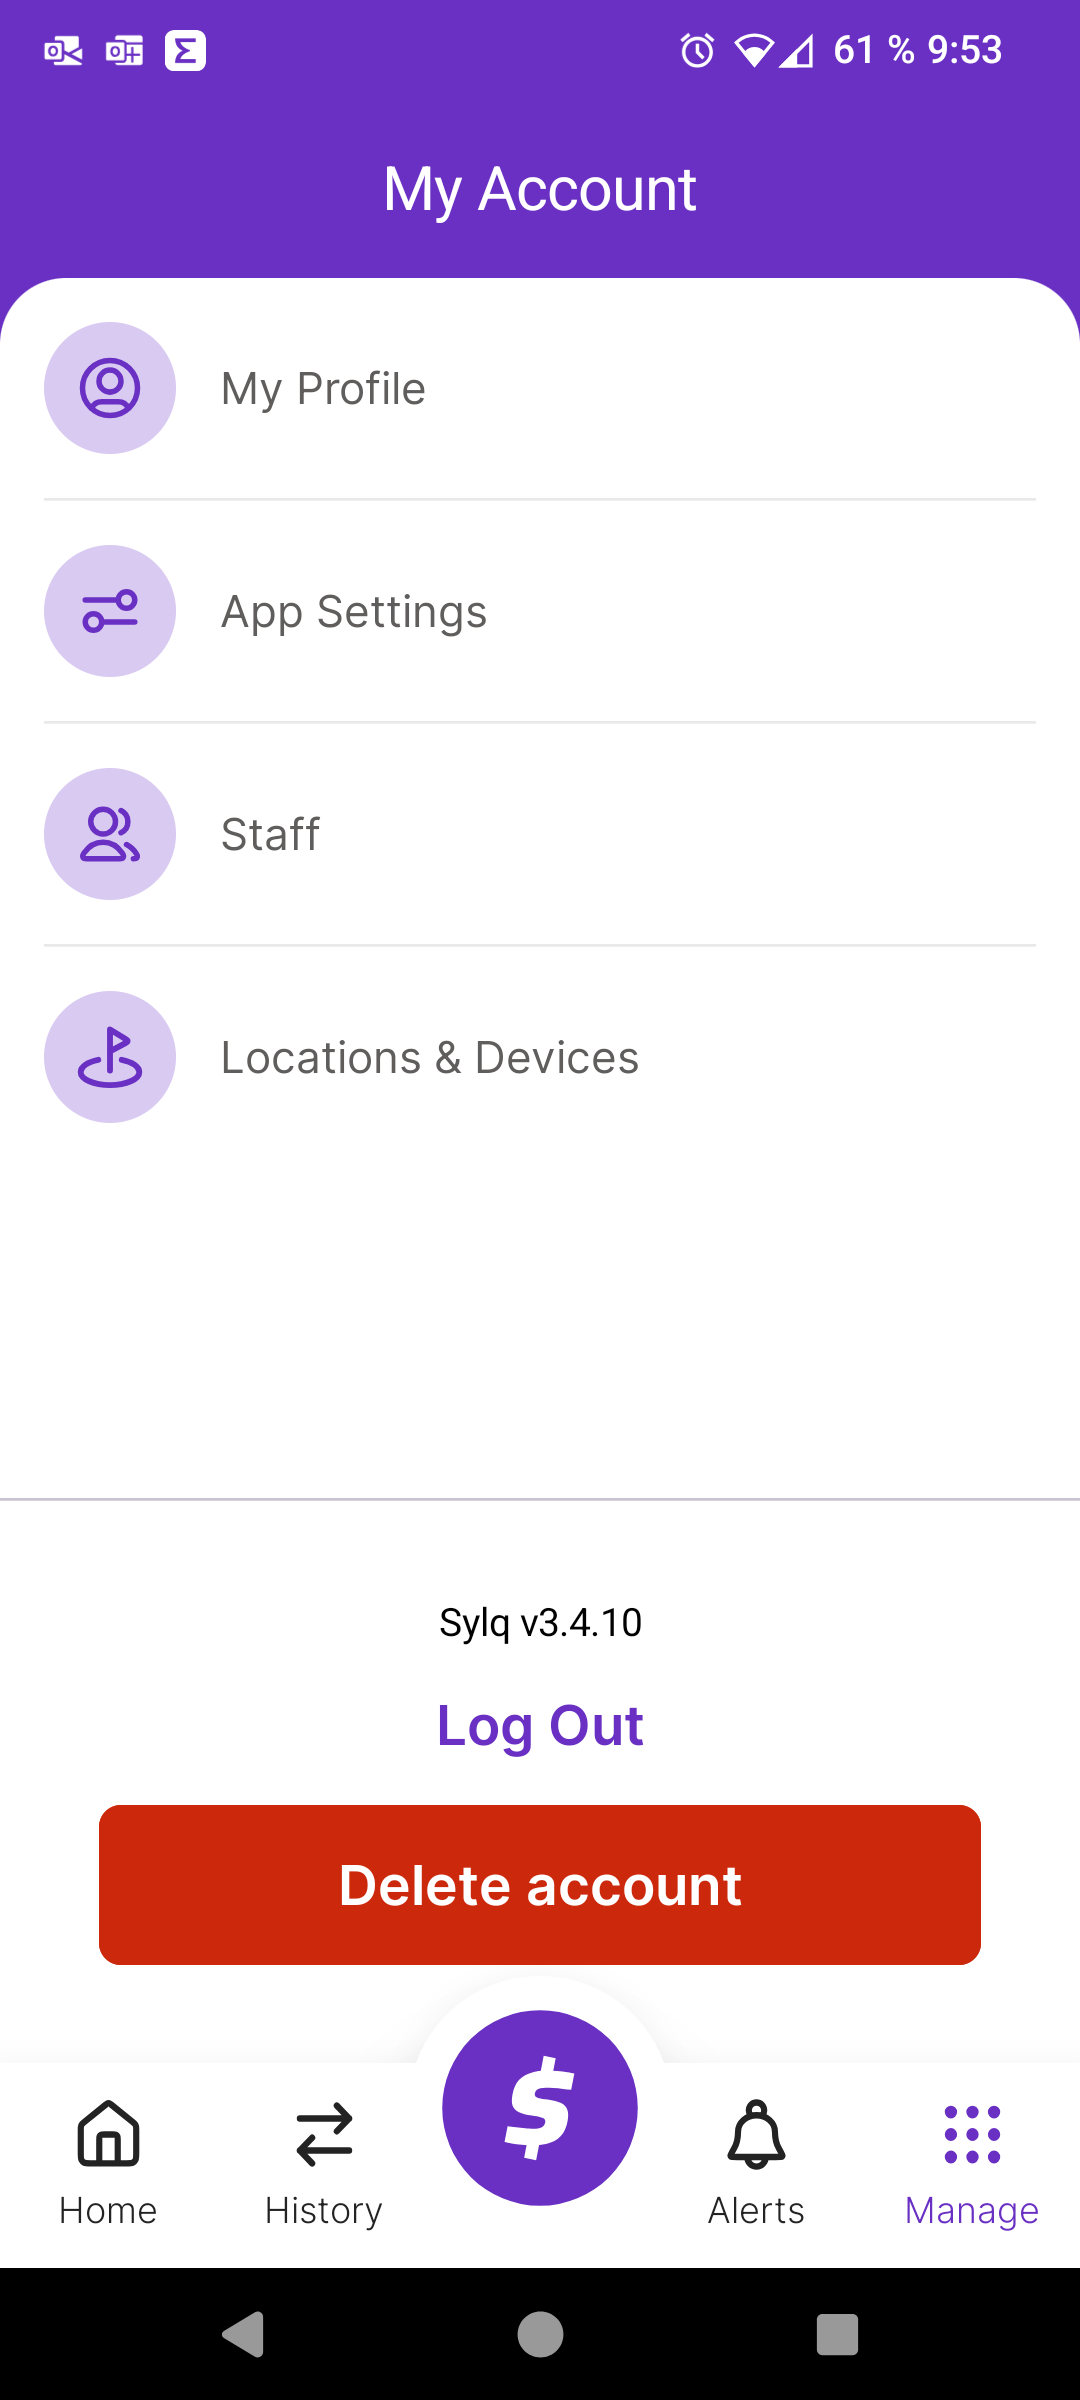
Inside the Manage section you will see four options, My Profile, App Settings, Staff and Locations & Devices, if you want to change the IBAN you need to click on App Settings, please.
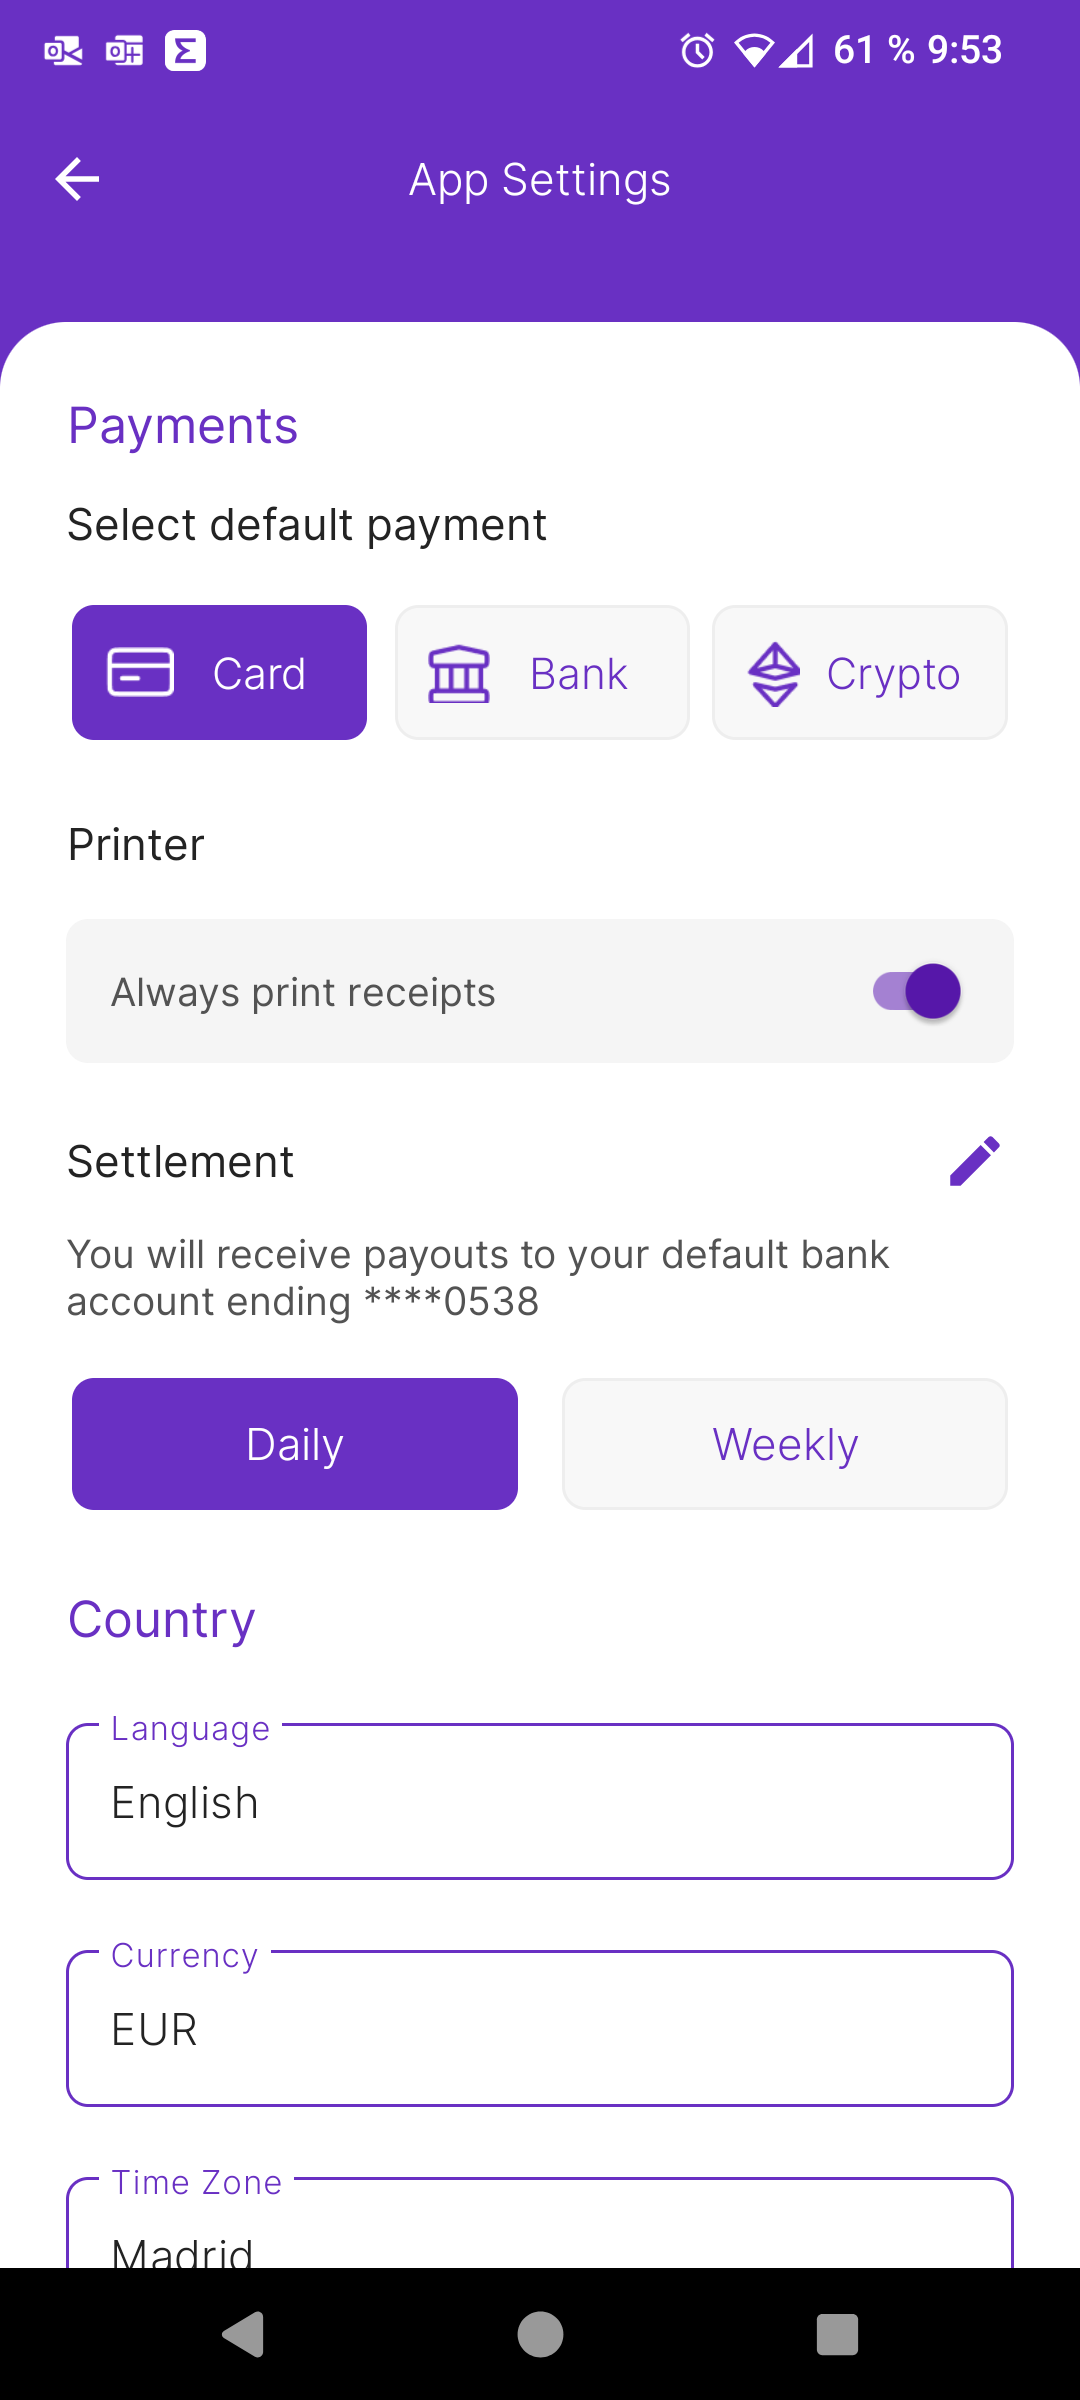
Inside the App Settings you have an option to manage the Settlement, here you have a pen icon where you can edit the IBAN and two buttons, one for marking a Daily settlement and another for marking it as weekly. As you wish.
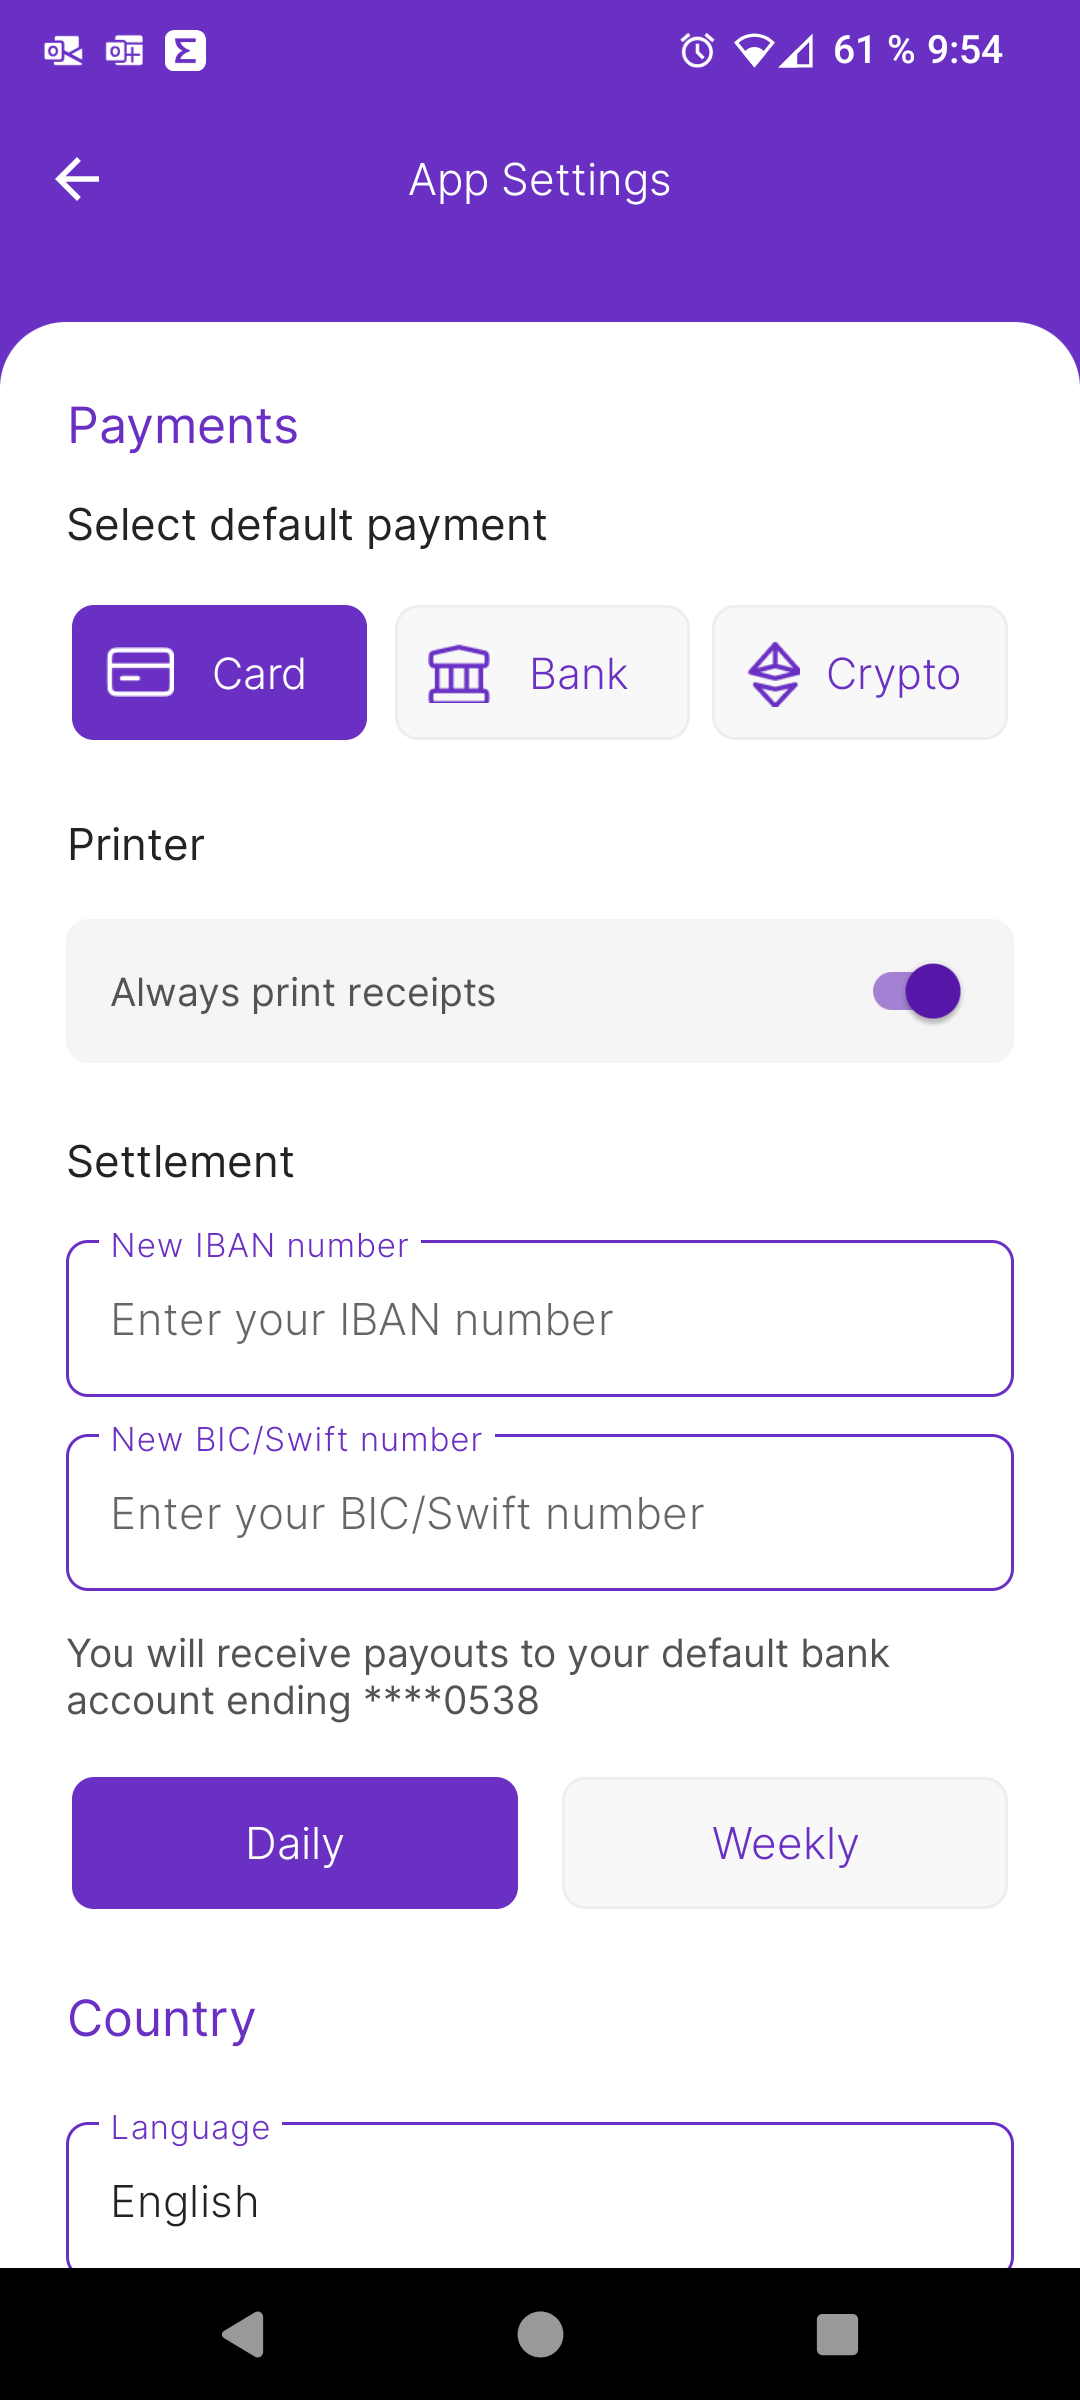
After clicking on the pen icon you will have the option to change the IBAN, please use it to add your new IBAN and the BIC/Swift number, required for the settlement.